| < Previous page | Next page > |
|
Communicating with a Data Recorder
In this tutorial you will learn how to:
Please note that due to the number of different data collectors/total stations, and the appalling lack of any form of standard within the survey equipment industry, it is not possible for us to give a blow by blow description of how to handle each individual brand.
Instead, we have provided a list of the steps involved in the process, and if you learn this process you should be able to easily apply it, with slight modifications where necessary, to you own particular situation.
Define New or Open Job.
Depending on the task at hand, you may need to either Start a New job with whatever name you choose, or Open an existing job stored on your computer.
By this stage of your tuition you should be able to achieve these tasks without further instruction. (and if you can't, please save us both the hassle and go back and do the early tutorials).
Collect Raw Data from Data Collector.
This is a 'terminal window' that will communicate with your Data Collector to collect the information as it is transmitted.
In order to achieve this, it is essential that the communication parameters are set the same on both the Data Collector and the 'terminal window'
If they are not identical, then the communication will not be successful.
We cannot tell you what settings to use, because they can vary for a variety of reasons. However, the best advice we can offer is to determine what values are set on the data collector, and then change the computer to match.
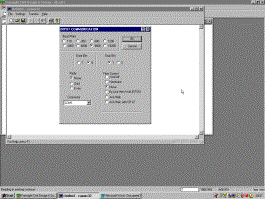
To alter the settings on the Computer, select the menu item titled Settings from the Menu bar in the Comms32 window.
Next select Communications In.
While there are no hard and fast rules in the computer industry about what any particular thing is called, it is essential that you have the name that matches the plug you are connected to.
However, since the same manufacturer can change the type of plug they use from one model to the next, there are no guarantees.
Once you have set the values as required, select OK to return to the 'comms' window.
Now select the item titled Transfer and then select Data to Computer.
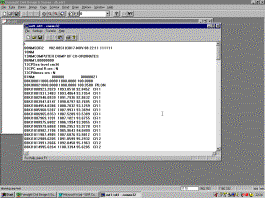
Once you have selected this item the comms window will go into 'dumb terminal mode' and sit there and wait to catch whatever is sent to it.
At this stage you need to start your Data Collector transmitting or sending.
You should start to see information scroll up the screen as it is sent from the Data Collector.
If no information can be seen scrolling onto the screen, it is likely that;
If there is Information appearing on the screen, but it appears to be in ancient Egyptian characters rather than the characters you are used to, you have set one or more of the parameters called Stop Bits, Word Length (or Data Bits) or Parity incorrectly.
In the event that the data does not appear, or appears in a scrambled format, you need to go back, check the values you are using and make sure they are identical on both data collector and computer.
If you are still unsure what is wrong, change one value on the computer and try to send the information again. If still no luck try changing the values one at a time.
Presuming the communication is happening correctly, you should wait until all the Data has finished scrolling up the screen.
Then you will need to press the Escape key to indicate to the computer that it can finish 'listening' to the cable for data.
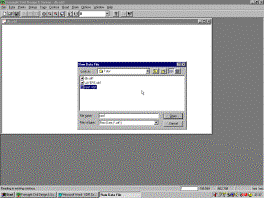
Next you should pull down the File menu within the Comms window, and us the Save As option to save the data you have collected into a file on the disk.
It doesn't greatly matter where you store it, or what you call it providing you remember where and what you have called it.
However I would strongly recommend that you store the raw data into whatever Folder you are using to store the job data.
Likewise it is good practise to develop a standard procedure for storing and naming the data files.
Fore example, if you were working on a job with an ID of '123' you might like to store the raw data files as 'Raw1.123'. 'raw2.123' etc.
Alternatively you can use the numeric form of the date, so if you collected the data on November 15 1998 you might name the file '161198.123'.
Either way, all that matters is that you do save the file away, and when you have finished this you can use File followed by Exit to close down your communication window.
The next step in the process is to convert the raw data from the format used in the data recorder to a format that CDS can understand.
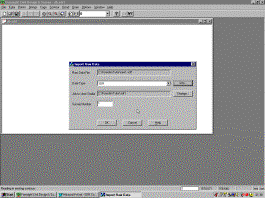
Import Raw Data
Pull down the Entry menu again and again select Data Collectors.
This time select the option titled Import Raw Data.
You need to identify the type of Data collector you are using from the pull down options available.
Once this conversion or importing process has been completed you will be returned to the blank screen.
Now it is time to look at the data you have collected.
Pull down the Entry menu and this time select the option titled Electronic Stadia.
Electronic Stadia
When the next screen appears, all that is required is to ensure that the relevant Survey Number is displayed, and then select the 'Open Existing' button.
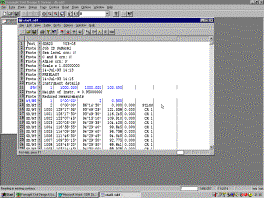
The program will now bring up a 'spreadsheet' which has your data laid out in it in a form you can view, edit and change as necessary.
If you are unsure of what you should do in this Stadia file please refer to the on-line help or the relevant tutorial for further assistance.
It is largely pointless doing this tutorial if you do not already have the basic understanding necessary to deal with the stadia file, so please make sure you have done the relevant 'stadia' tutorial before proceeding.
1. Check that Setup and backsight stations have coordinates specified before they are used in the file.
2. Use Options Calculate Coordinates to calc the coordinates of all the field points - if any errors are reported, you need to correct them and then calculate Coordinates again.
3. Once you can run calculate Coordinates without seeing an error message, you should use Options - Show Coordinates and then inspect he coordinates to ensure that they are of the right magnitude. Note you are not looking for millimetres, merely gross errors.
4. Once the coordinates are in the 'ballpark' use Options Store Data in Database to store the calculated coordinates into the job.
To Send Data From CDS To the Data Recorder.
When you have calculated a series of points in CDS which you wish to 'upload' to you Data Collector to take into the field for setting out purposes you need to follow the steps outlined below.
Decide on the Points you wish to Export
You don't need to do anything at this stage, other than to examine your job and note down which point numbers you wish to export to the data recorder.
Obviously it often helps if all the points required have been calculated within a particular point number range.
Export to the Format required
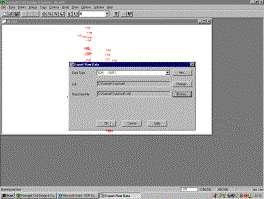
Pull Down the Entry Menu, select Data Collectors, followed by Export Raw Data.
A screen similar to that below will appear.
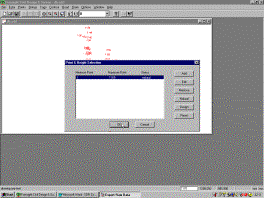
When you Select OK you may be given an option to store a Job heading or other descriptive information with the points. this is to help you identify these particular points when they are stored in the data recorder, so you can use any name you choose.
Next you will see a screen similar to that below.
Send Data To the Data Recorder.
Now pull down the Entry Menu, select Data Recorders followed by Send Data to Data Recorder
A new window with a heading of Comms32 - untitled will appear.
This is a 'terminal window' that will communicate with your Data Collector to send it the set out points you have selected.
First you need to load these points into the communications Window.
Now pull down the Settings menu and select the item titled Communications Out.
In order to achieve this, it is essential that the communication parameters are set the same on both the Data Collector and the 'terminal window'
If they are not identical, then the communication will not be successful.
We cannot tell you what settings to use, because they can vary for a variety of reasons. However, the best advice we can offer is to determine what values are set on the data collector, and then change the computer to match.
Once you have set the values as required, select OK to return to the 'comms' window.
Now you need to prepare your data collector ready to receive the Set out points you are going to send it.
Once the Data recorder is ready to receive, Select the item titled Transfer and then select Data to Data Recorder.
At this stage the points will start transferring into the data recorder.
|