| < Previous page | Next page > |
|
Feature Coding and detail survey
In this Tutorial we will learn how to:
Introduction
Surveyors do not collect lines in the field. When they do a detail or topo survey, they pick up discrete points, and we need then to put strings or lines through those points to draw a plan.
The Plan is needed whether you use CDS or a CAD package to produce it, however in CDS you are also usually creating a terrain model, and you also use the strings in two areas to control how the model is formed.
1. Breaklines – (also called discontinuities) define where the slope or grade of the land ‘breaks’ or bends. Typical break lines are the top of bank and the bottom of bank.
2. Boundaries – define enclosed areas where you wish to exclude contour. Typical boundaries are houses and buildings, dams and reservoirs, and sometimes the road surfaces and batter slopes where you don’t want contours to appear.
You can ‘join the dots’ manually, or you can use Feature Codes on the points to automatically join the points together with strings.
If you wish to do it manually, the strings can be added in either a CAD package or in CDS. But, since we have already seen above that CDS uses the strings for two processes, it is better to make sure that the strings are correct in CDS, where they are of greater use, and then transfer them to the CAD package along with the model for final enhancements.
And, because we understand the importance of this step, we have built routines into CDS to help you get it done more efficiently.
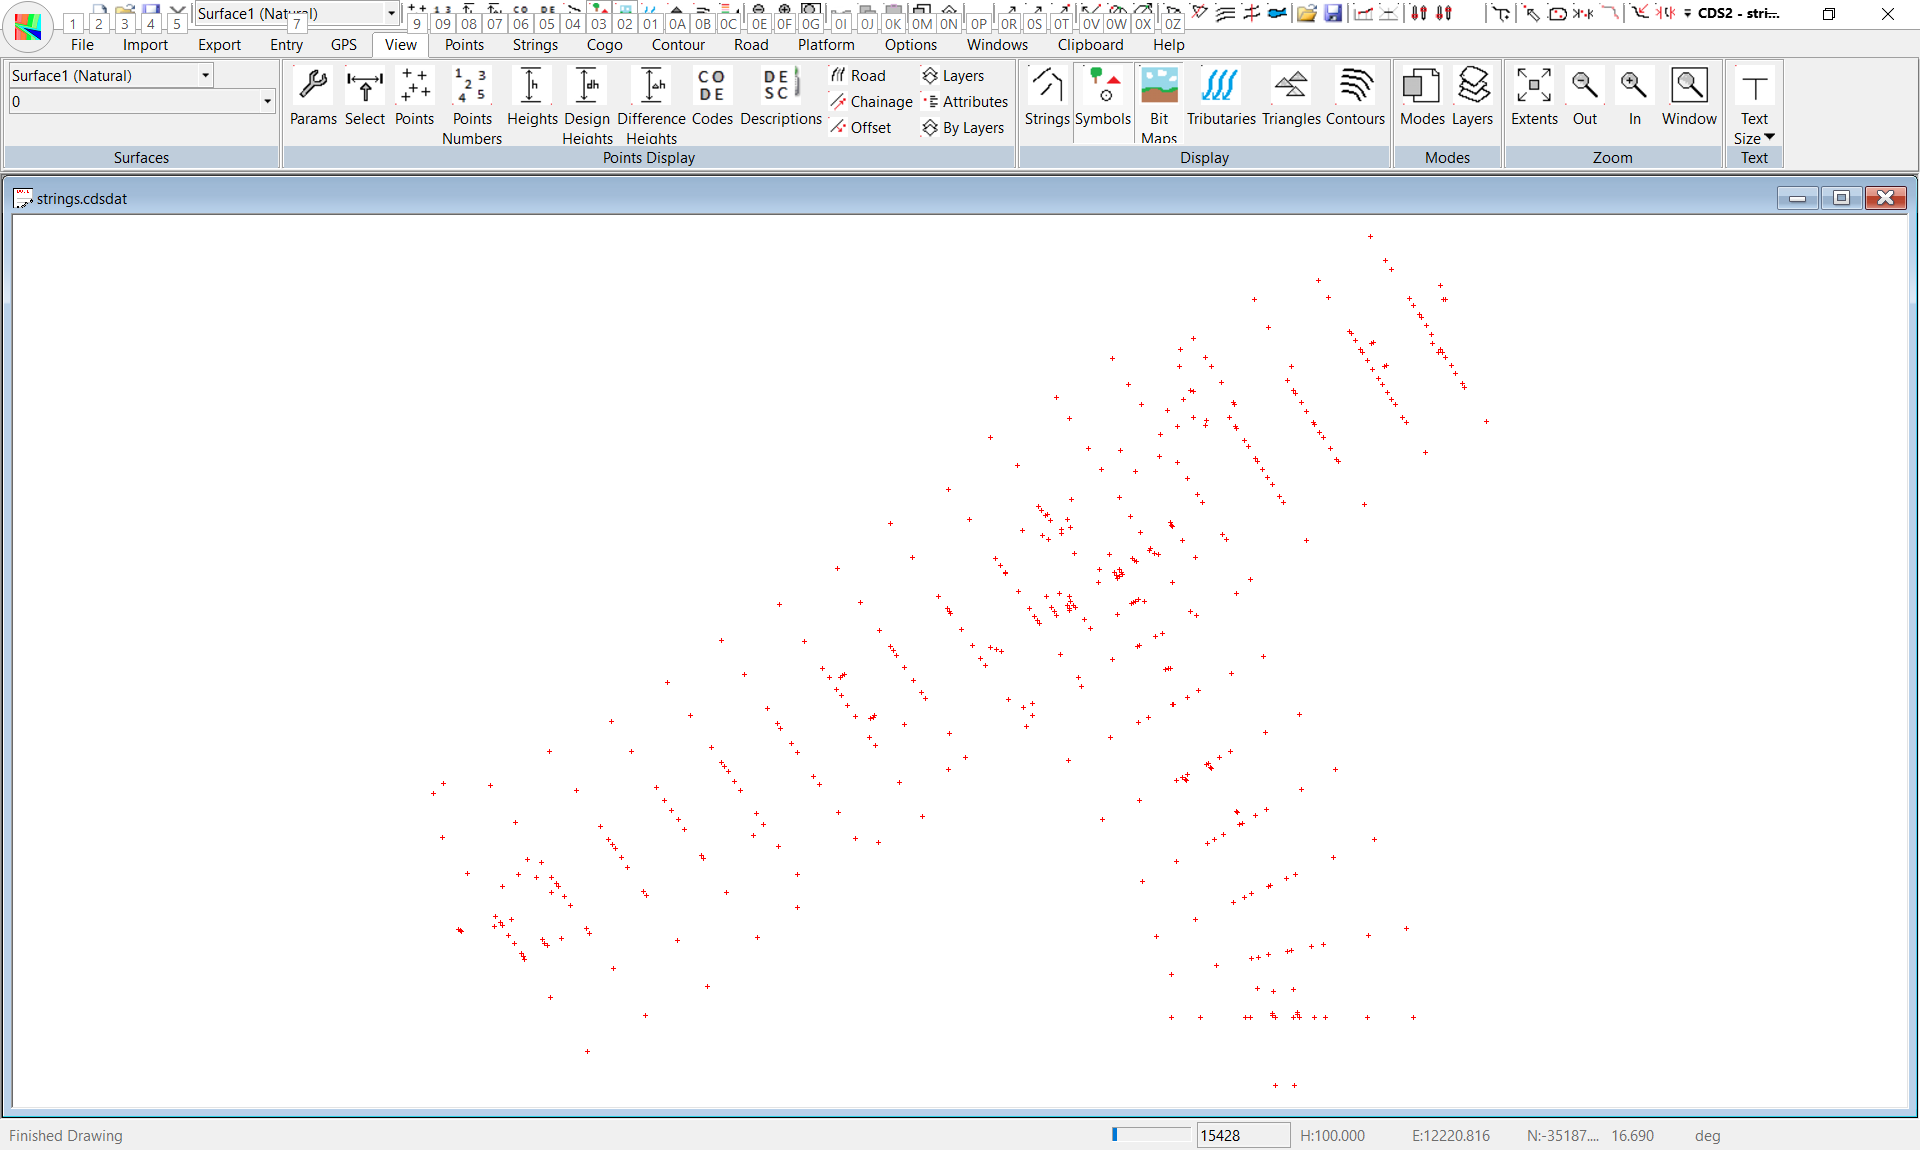
You should see something similar to that below.
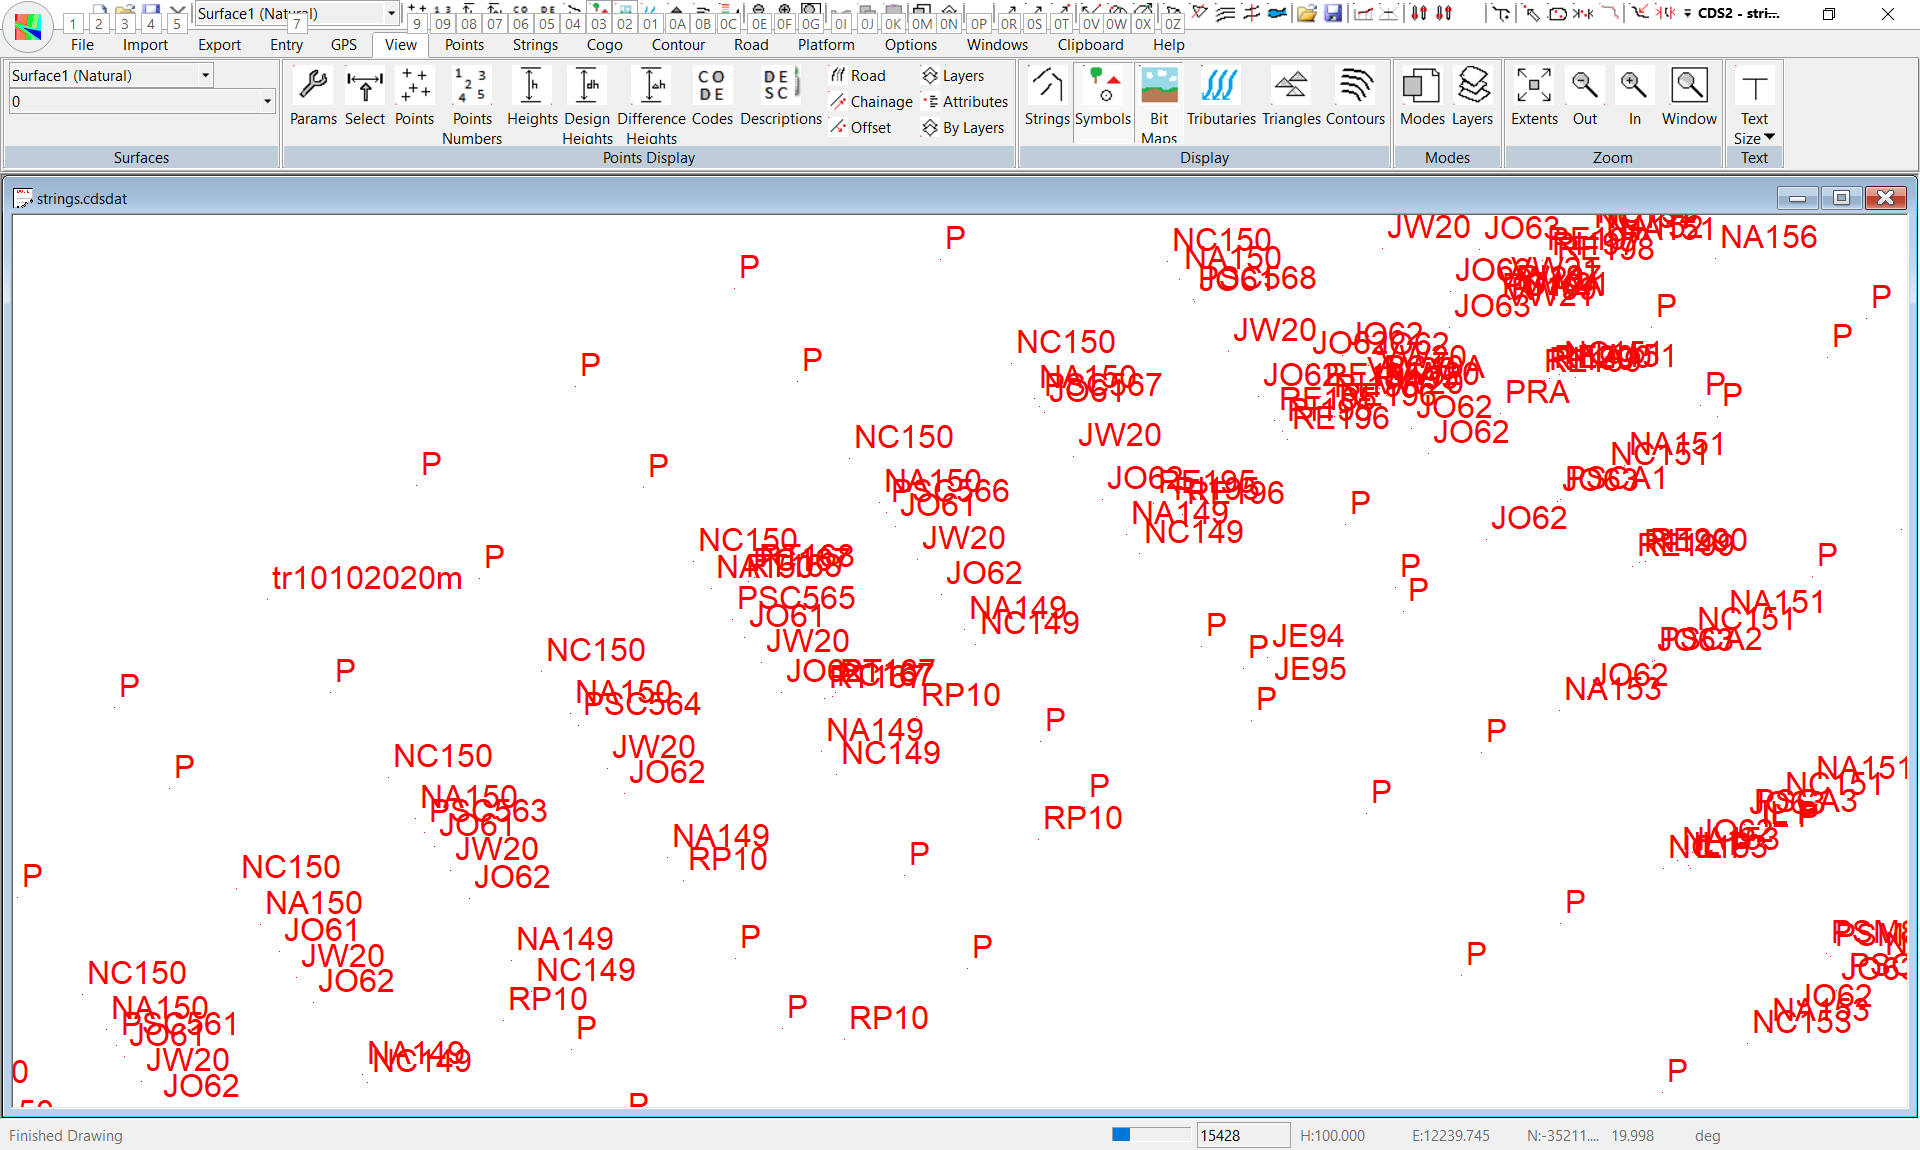
You should be able to see that the field party have used codes, and from a quick inspection you will see that there is some vague pattern to the codes they have used.
As far as you are concerned it doesn’t matter what the codes are, as long as you can identify them, but for background information, this job was done by a client in Malaysia using codes which are abbreviations in the Malaysian national language. If I tell you that Jalan is the Malaysian word for road then it may make sone sense that we will concentrate on codes starting with ‘J’
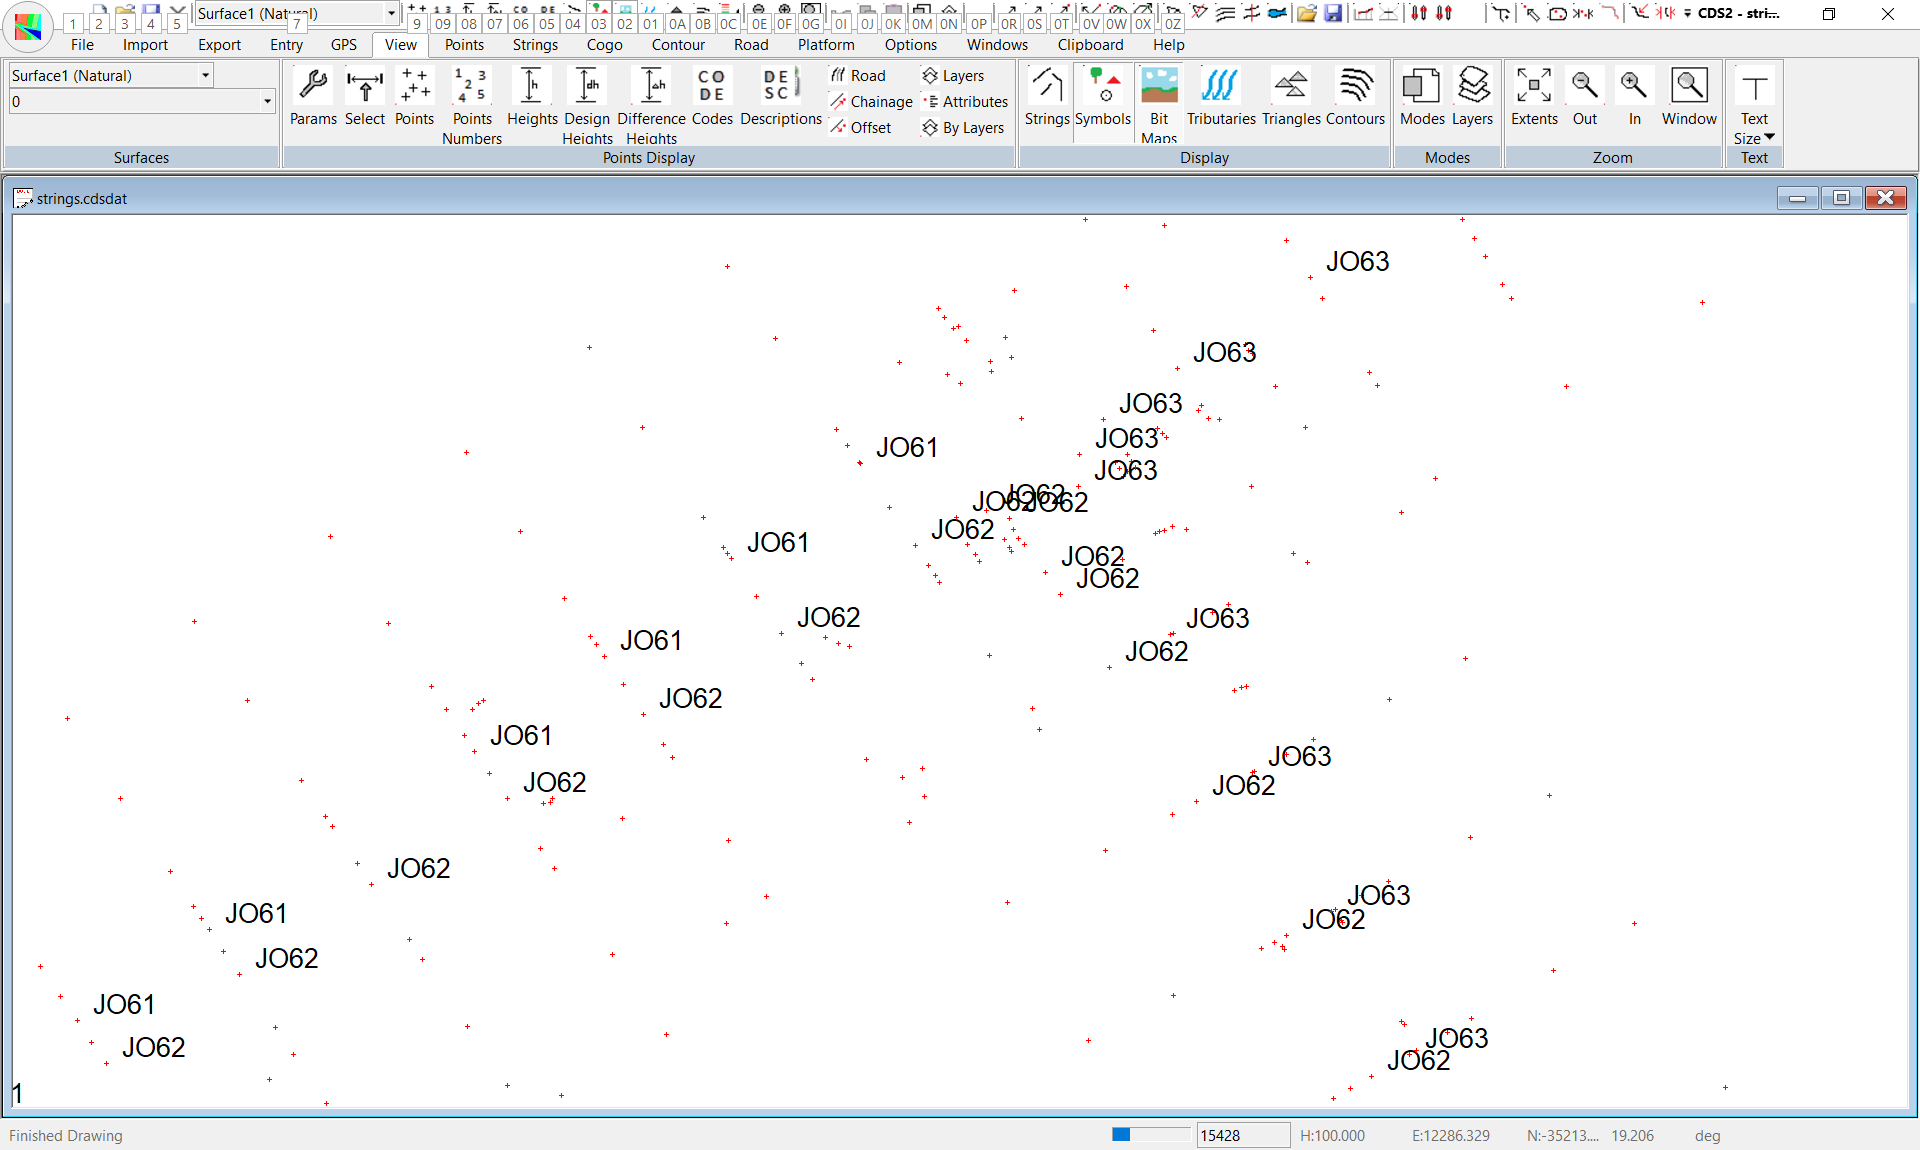
For the moment we are going to concentrate on just the codes using ‘JO’.
Now that you can see a clearer picture of just these two codes, if you wished, you could form strings manually by just ‘joining the dots’.
However, there is a much quicker way of creating the strings, and that involves using the Feature Code Library.
Feature Codes Defined
You can see from the screen above that the field party in this case has used codes of JO61 and JO62 among many others.
In this instance, the ‘JO’ is actually the code, which is an abbreviation or shorthand indicating that all points coded with JO are on the edge of the road. The ‘61’ or ‘62’ is a ‘string number’ indicating that in this job there are at least 62 distinct ‘strings’ connecting points on the edge of the road.
How you and you field party arrive at a particular coding system, and what codes you choose to use, is not particularly important, as long as you have some consistent system. We recommend that you develop a ‘standard’ set of feature codes which consist of 2, 3 or 4 letters, and that you then code each point with its relevant code and a ‘string number’ relevant to the job. For example, while the data in this example has JO to denote the edge of road because the survey was originally done in Malaysia, you might choose to use ER for Edge of Road, or EP, for Edge Pavement, or whatever other abbreviated code that might make sense in your area.
Here we will show you how to handle the codes that have been used in this set of data, and you can then translate the use of those tools to your own circumstances.
Using the Feature Code Library
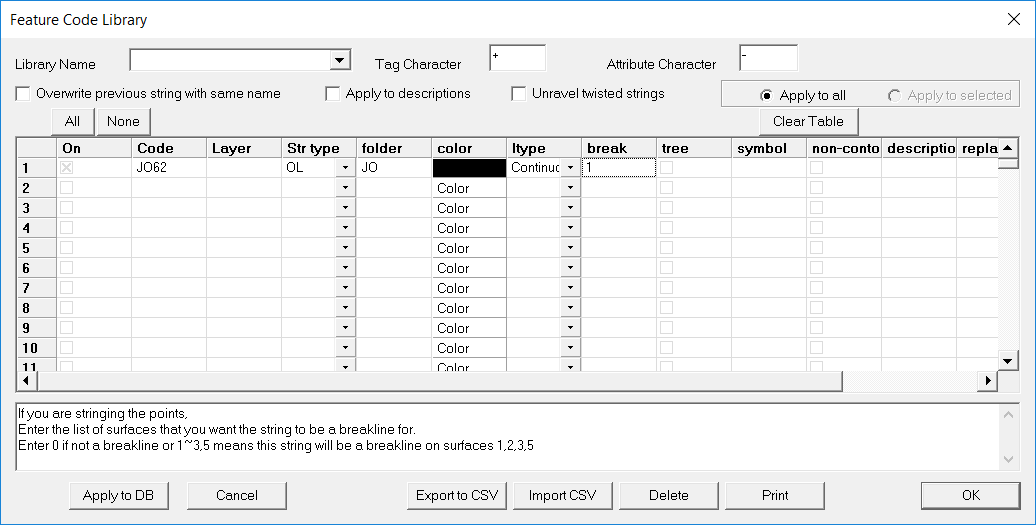
Select Entry -> Codes (Features) and you will see a window similar to that above appear.
Select the New button and enter a name of ‘Strings’ for the library name, and then come down to the first line in the table.
If you ‘click’ you cursor over the blue bar in the first column, the bar will vanish and you can type in the code you wish to deal with.
Lets start with the code JO62, so type it into the cell and press the Enter key to move to the next column.
Now you are in the Layer field, and since these points are on the Edge of the Road, maybe we could use a layer of Road.
Next you come to the “String’ column. Here you have a choice of either;
Open Loop – i.e. line goes from the first point to the last point and stops
Closed Loop – the line gets to the ‘last point, and then joins back to the first point to make a ‘Closed Loop”
Otherwise leave it blank.
Here you need an Open Loop, so select OL from the choices followed by OK. Unless you have some particular reason for using different names for the layer and Folder, we suggest you keep them the same, so use a folder name of ‘Road’ to store the strings. If you click on the button in the Color column, you will see a palette appear allowing you to choose the color of the line. Black is fine for the moment, but you can let your artistic inclinations loose if you wish. The next column is to specify the LineType format, and if you click on the down arrow you will see the current linetype defined. Select what is appropriate. See the appendix if you need to add in your own line types. Next you come to the “Breakline” column. This allows you to specify which ‘surfaces’ this particular line will create breaklines (or discontinuities – pick the term you prefer ) for. If you are not sure, or don’t want this code to create breaklines, leave a zero in the field. Alternatively the strings can go into folder discon1 if you need them as breaklines on surface 1. Discon2 etc for surface 2.
Having done all that we need to do for the moment, you should click the “Apply to DB” button.
A message will soon appear to tell you that the Code Library has been applied to the database, so select OK to close down the code library.
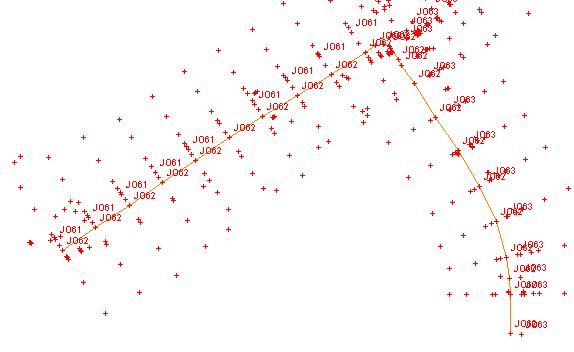
You will now seen a line joining the Points with a code of JO62, and as far as you can see it seems to have completed the task successfully.
If you Zoom Extents, you will see the following screen, and you should see the code has done a very good job of automatically creating the strings around the edge of the road coded with JO62.
To complete the rest of the task, you could go back to the feature Code Library and type JO63 on the second line and fill it in, then type JO64 on the third line etc etc, but that is tedious, even though it would probably end up quicker overall than manually ‘joining the dots’.
We have another ‘automatic tool’ that you can use, and that involves using what we call a ‘wildcard’ to substitute for each of the string numbers.
Go back to Entry>Feature Codes and Change the current entry of ‘JO62’ to be ‘JO*”.
The * is what we call a ‘wildcard’ and it will work in such a way that all points with a code of JO1 will be joined together as will all with JO2 and so on up to JO999 and obviously including JO61, 62, 63 etc.
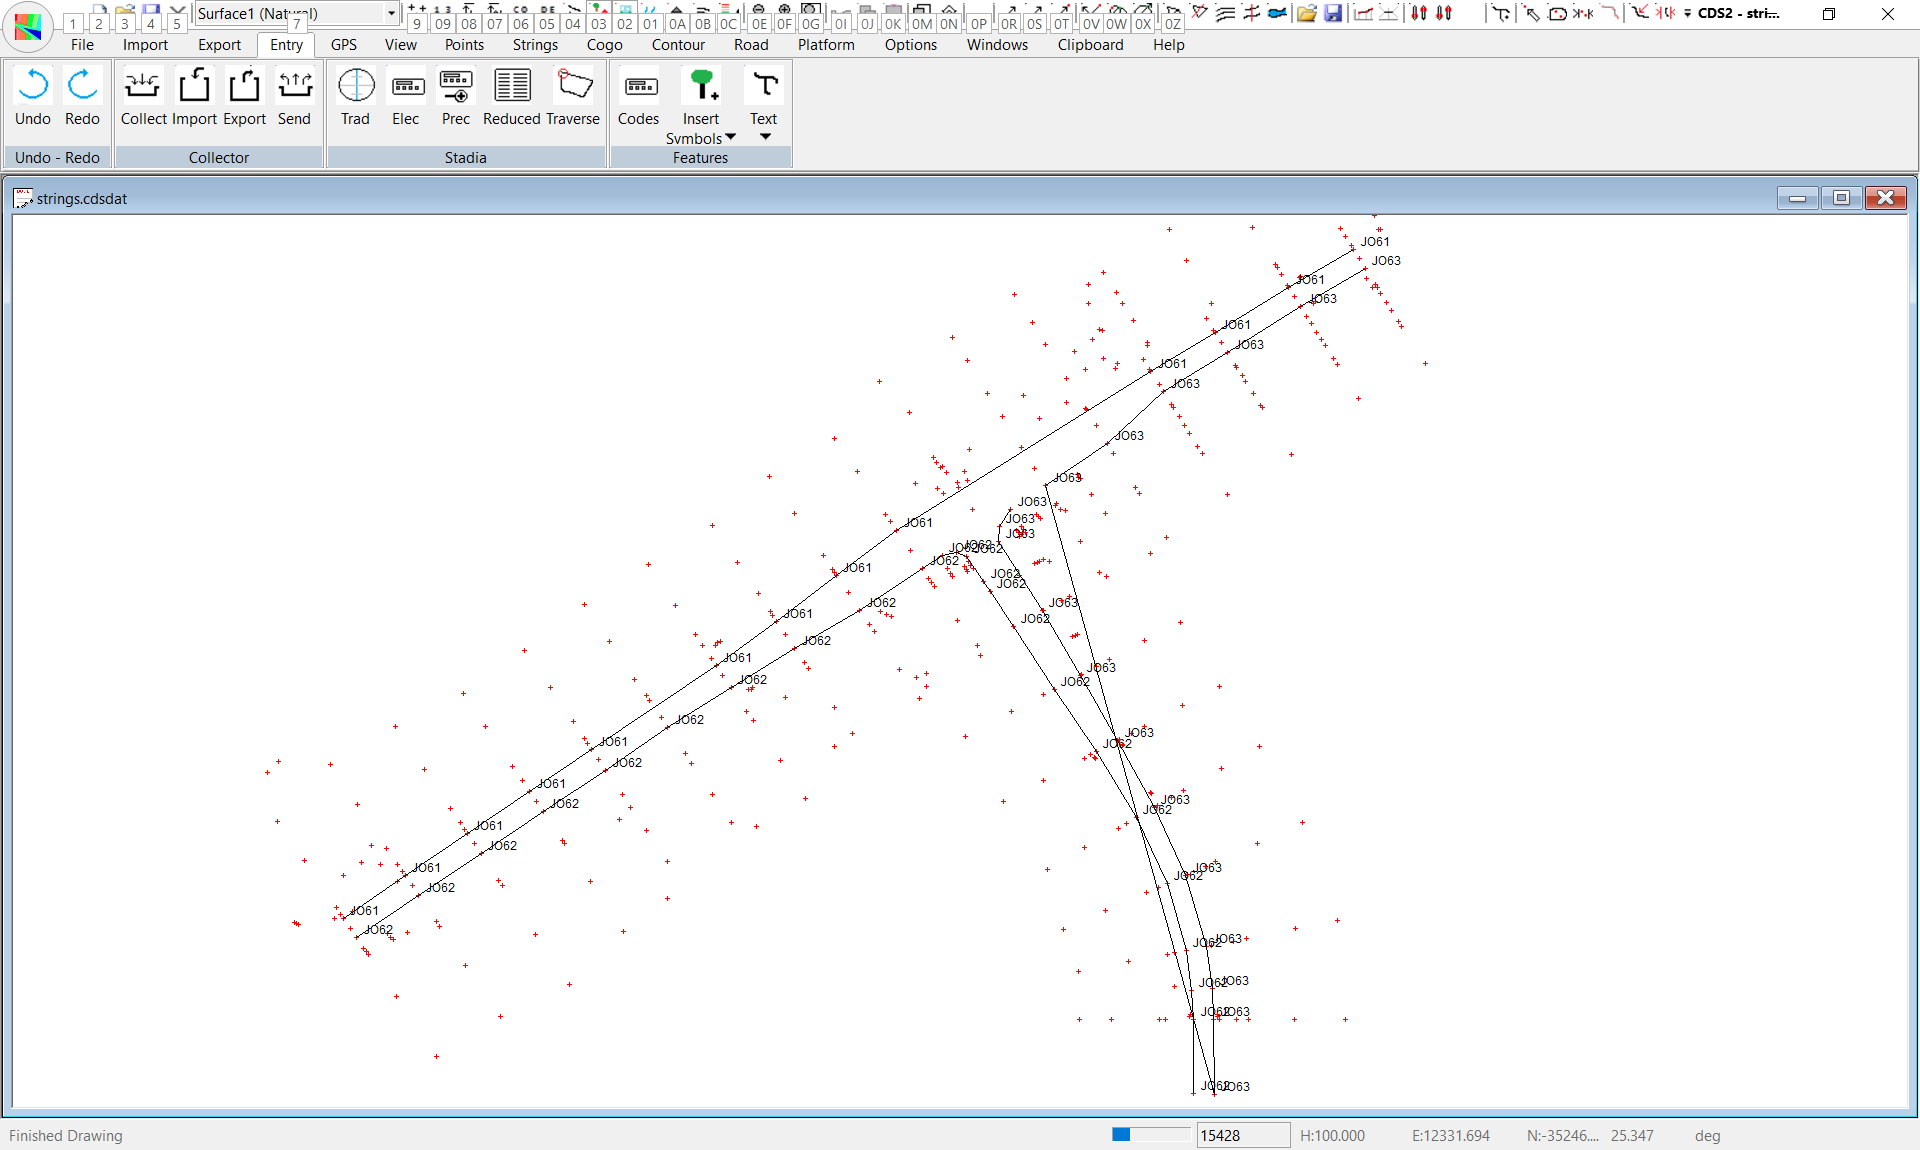
So, by using a consistent code such as JO (or ER, or EP) together with a series of Unique String numbers, we can use the one entry in the code library to automatically create all the strings on all jobs from now forward.
As you can clearly see there is a small problem on the right hand side where the strings have got ‘confused’.
At this point you need to make a ‘life decision’ and decide whether you prefer to be an optimist or a pessimist..
We believe that it makes much more sense to be happy about the 90% that is right and fix the small glitches, rather than go back to the manual method because of the 10% wrong.
We know that while ever the field party is made up of humans, they will not always get it right.
Even the best party can have things like;
The wrong code on the points
The wrong sequence of points
They will ‘double back’ or cross over
They will use the wrong string number, or none at all.
When you take into account the conditions where the field party works, with extremes of temperature, traffic, insects and dirt and mud, it is understandable that sometimes they make a mistake.
Since we know that it is likely to happen, we have built in routines to speed up the fixes when something does go wrong.
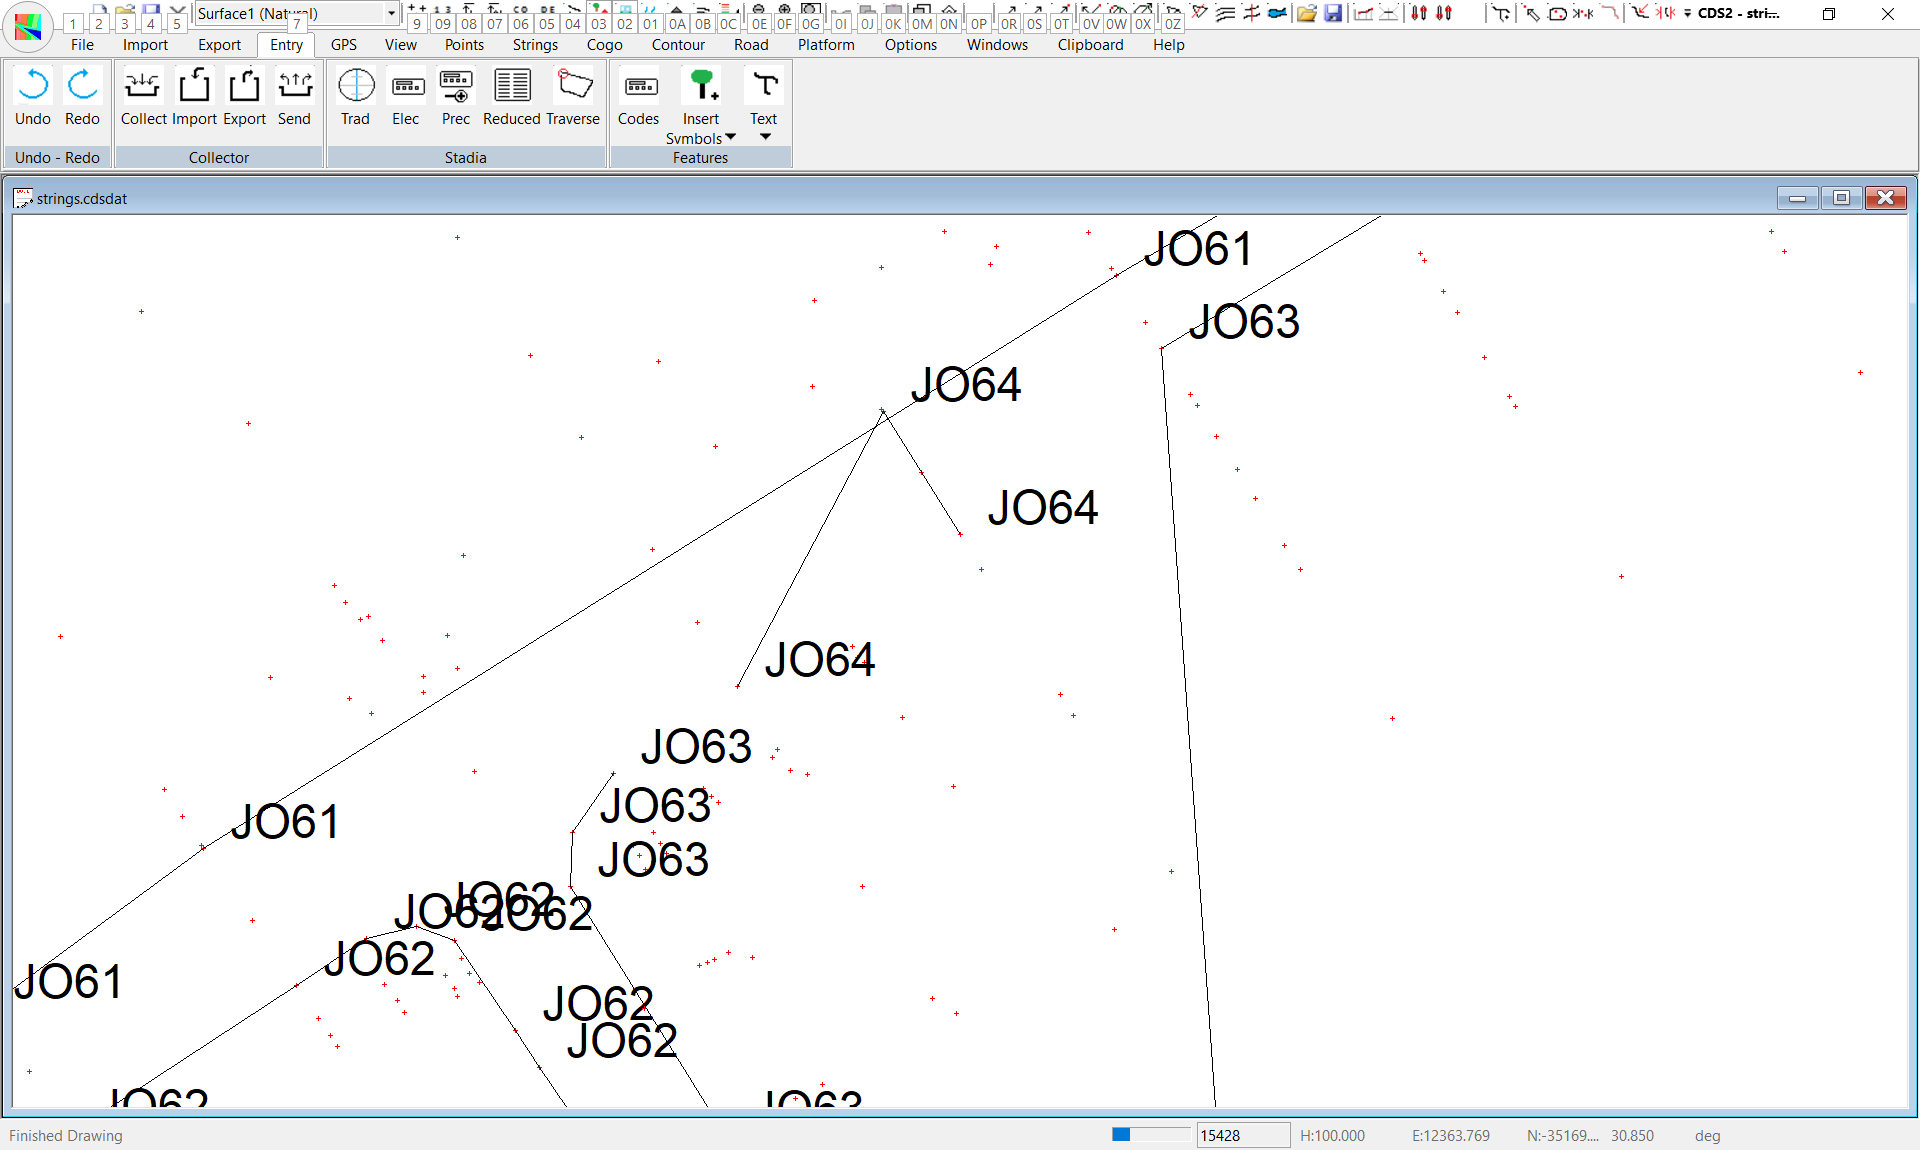
Lets look at J064
Or, you can change the string definition manually after you have isolated the point that is wrong.
Or you can use one of the tools we have provided, and automatically drop the point from the string.
Drop Points from Strings
You need to select the point or points you wish to ‘drop’ from the string.
If you try and select a single point near the incorrect vertex, you will find that there are quite a few in the area.
So, use Points > Select > Select by Polygon to place a polygon around all the points in that area.
Then use Strings > String Utilities > Drop Points from strings.
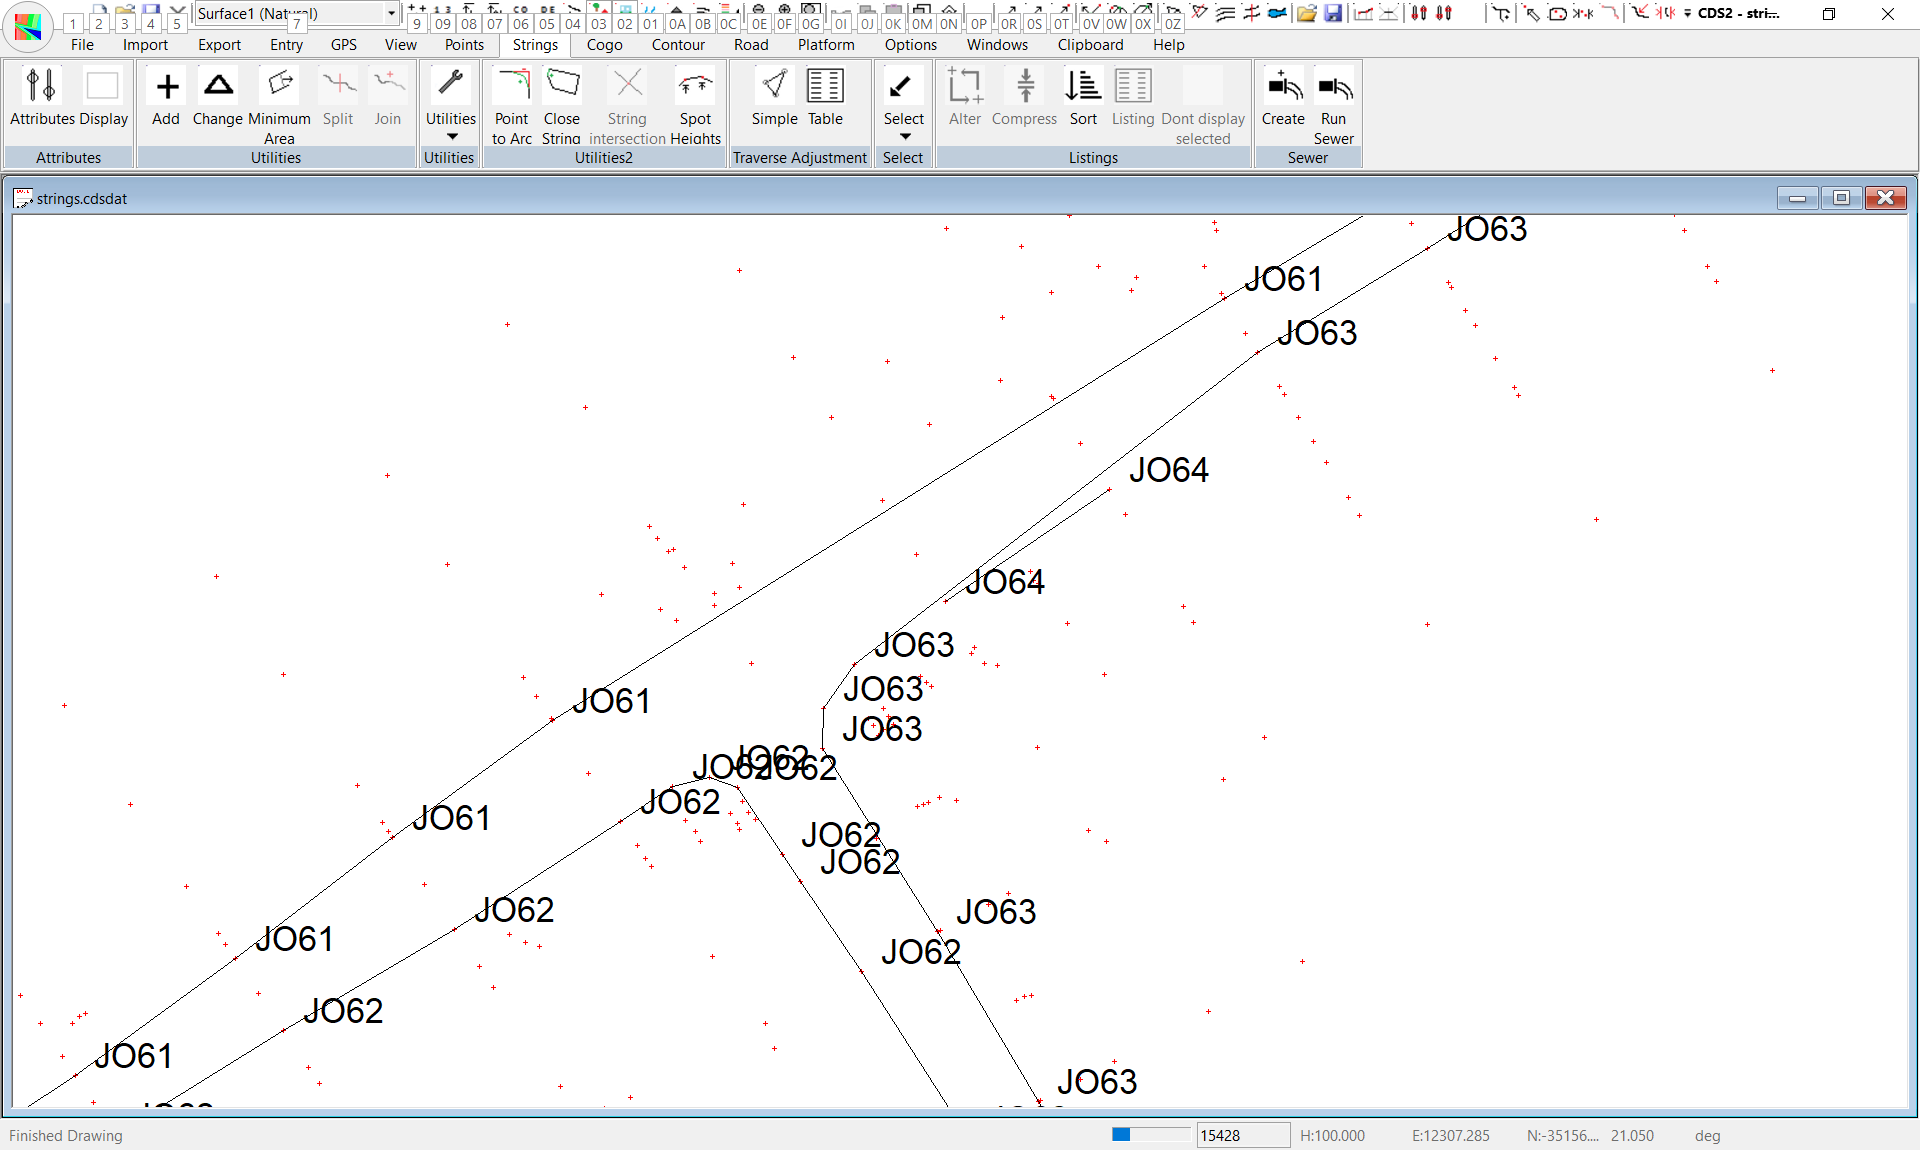
The routine checks all the selected points and any it finds in the string are automatically removed from the string to give you the correct string as seen below.
Note: this is a ‘quick fix’ to get the picture correct – it does not automatically correct the data, and is only effective if you are going to plot or export the strings you ‘fix’ with it before you run the feature code library again.
Obviously, if the code on the point stays at JO64, then the next time you run the feature code library, the peak will re-appear.
So, maybe you should use Points > Edit and select Point 15320 and alter its code to NJO64 (my way of correcting field errors is to put ‘N’ for ‘not’ in front of the supplied code. I can then select all these ‘not correct’ points and list them out or export them and hand them over to the field party to rectify if that is appropriate.
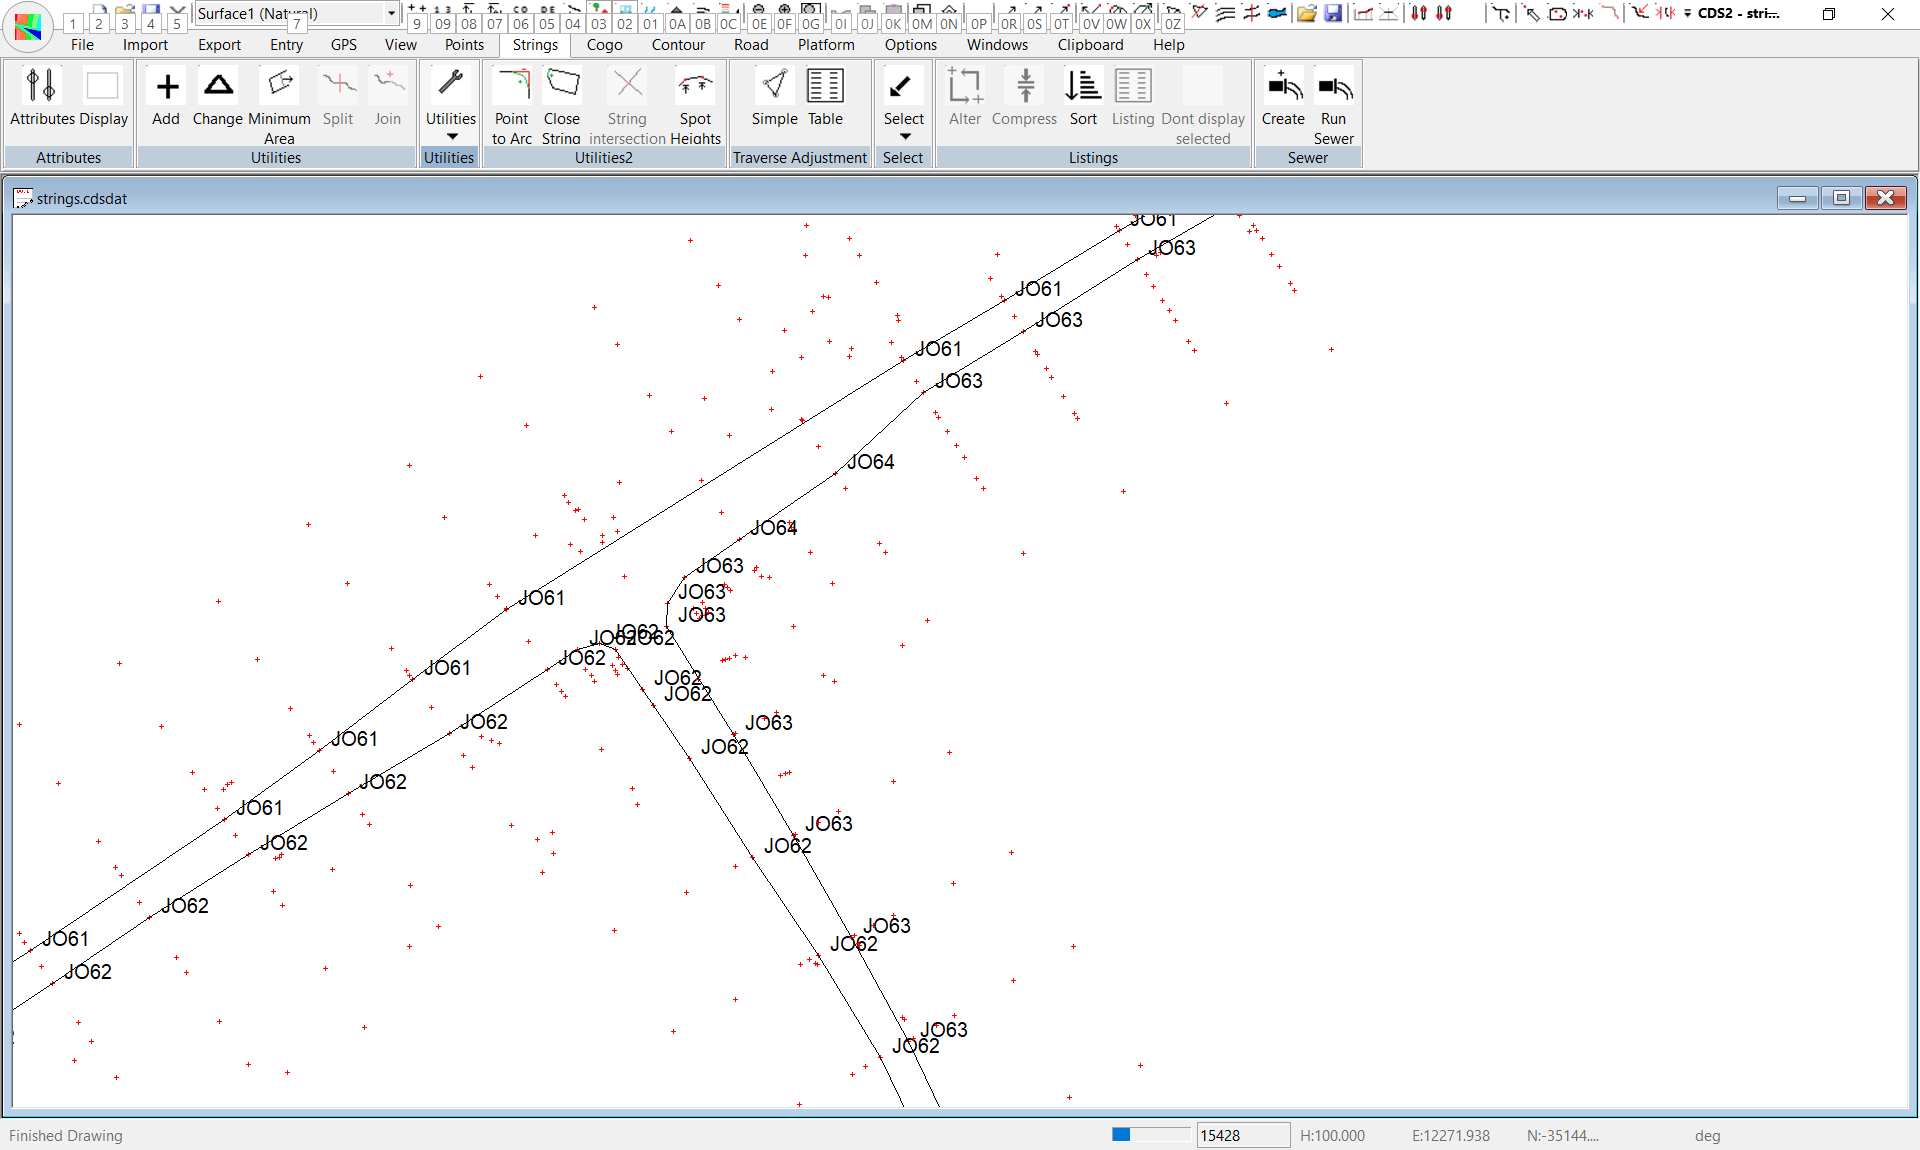
If you look at the string through the points with the code of J063 you will see that it is a mess. Zoom in on the North Eastern end for a closer look.
Select Strings > Utilities – Unravel Twisted Strings.
A ‘pop-up window’ will appear so you can enter the string.
Point to the ‘JO63’ string with your cursor and you will see that its name and folder are included in the ‘window’
Now click the OK button and then cancel to close down the dialog.
The ‘correction’ to this problem is not immediately obvious, apart from manually editing the code on the two points, or manually editing the JO63 string to try and insert these two points in the correct location.
Either manual solution is possible, but there is a quicker way once you are aware of a tool called Unravel Twisted String.
This routine will fix up any string that starts at the correct point but gets ‘twisted up’ later.
So, if we know that this can work, we can simply insert these two points into the JO63 String anywhere after the first point, and then let Unravel fix it, rather than having to search through for the correct location to insert the points. It is actually easier to do than explain, so lets do it.
Select Strings> Change.
When the ‘change window’ appears, simply point to the JO63 string with your cursor to see the screen at left.
Now scroll down to position your cursor at the end of the points defining the string, and then ‘click in’ the two points with the wrong code of JO64.
The press Finish to see the screen below, where we have we have created another ‘mess’ but we did so deliberately with a reason in mind.
We know that this string has the correct starting point, and gets itself ‘twisted up’ later on, so it is the perfect candidate for Unravel.
Select Strings > Utilities > Unravel Twisted String.
Point to the String and its details will appear in the ‘unravel window’.
Now click OK, and then close down the Unravel window and the string is now correct as seen below.
You should now correct the two points which still have a code of JO64 even though they are correctly placed in the JO63 string.
|