Creating a Pipe Report PDF
In this FAQ we will explain in more detail how to create and fine tune the pipe PDF report.
To start the process click on Pipes -> PDF Report.
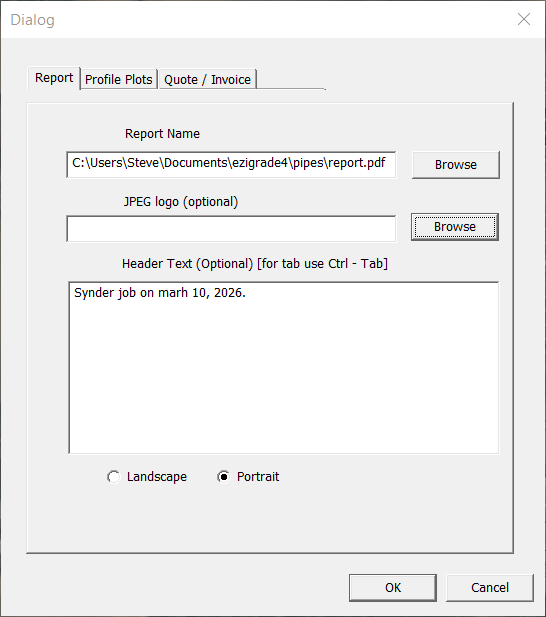
You are presented with a multipage dialog.
The first page allows you to set the file name of the created pdf. Select a company logo jpeg file which is displayed at the top right. Optional header text and whether you want screenshots as portrait or landscape.
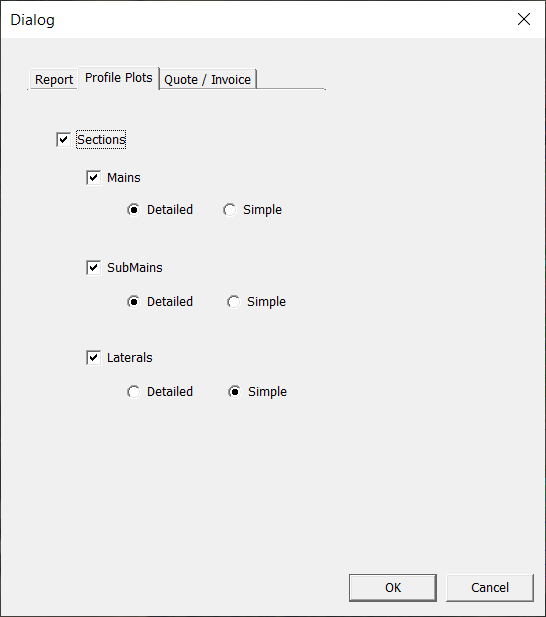
Clicking on the Profile plots page gives us this:
Unticking the "Sections" tickbox turns off sections altogether. At present we have 2 fixed formats. A detailed and a simple format. Examples are shown below:
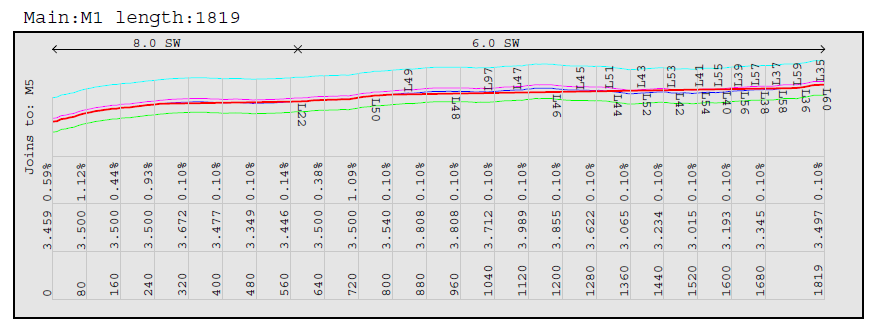
Detailed:
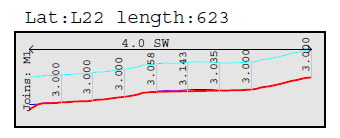
Simple:
In our example we have set the mains and submains to detailed and drawn the laterals as simple. Many users only wish to display the Mains which you can do.
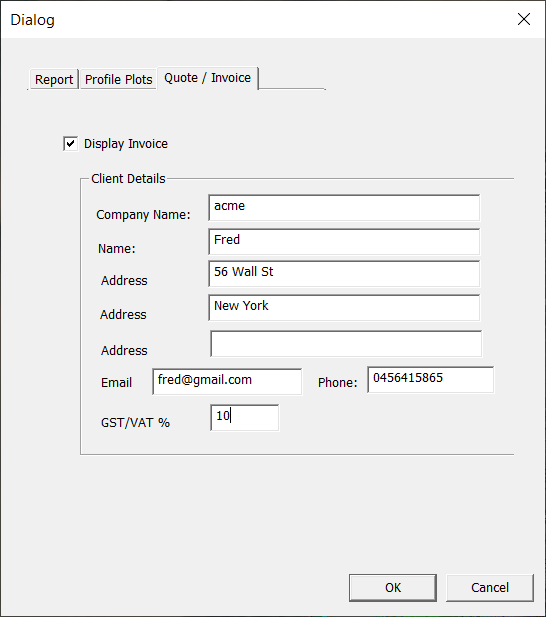
On our last page we have details we may wish to display on an invoice.
Creating a successful invoice is more involved as we need to setup:
-
define and setup pipes used
-
fill in a table for fittings used
-
fill in a table for earthworks cost via depth
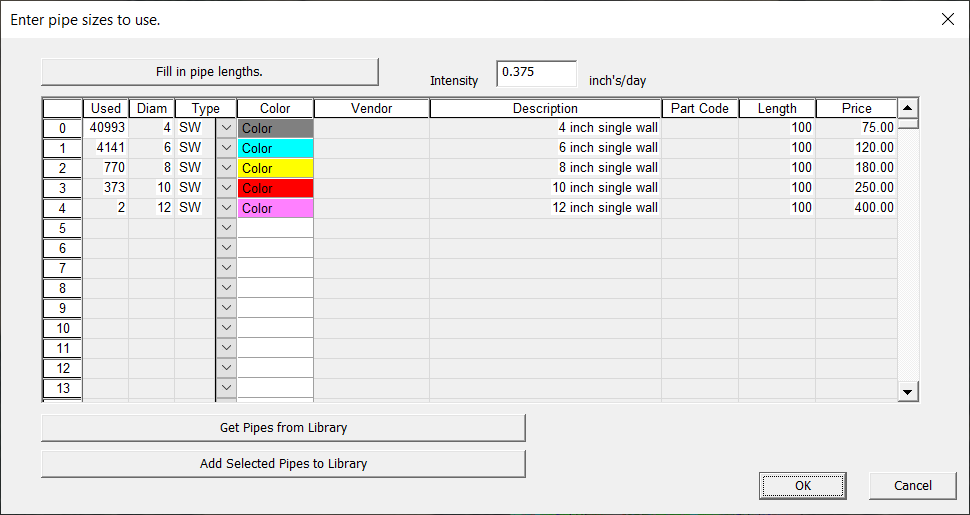
Define and Setup Pipes Used
We need to have run the Pipes -> Pipe Diameter dialog.
You need to initially fill in the table with pipes to use. ie fill in diameter, type, color, description etc. For the invoice we need to enter the Length and Price.
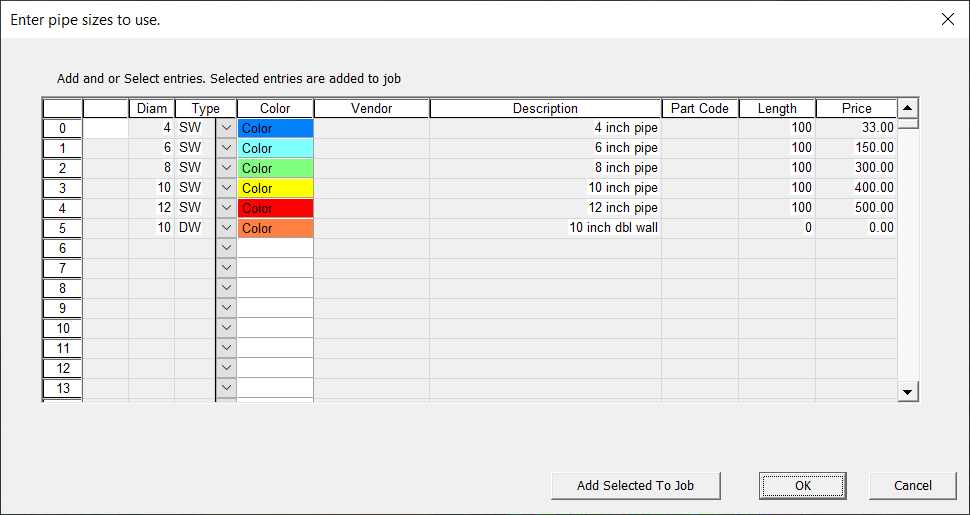
You could do this again in the next job. However you can be smart and instead of filling in this table, click on the "Get Pipes from Library" Fill in this table as well.
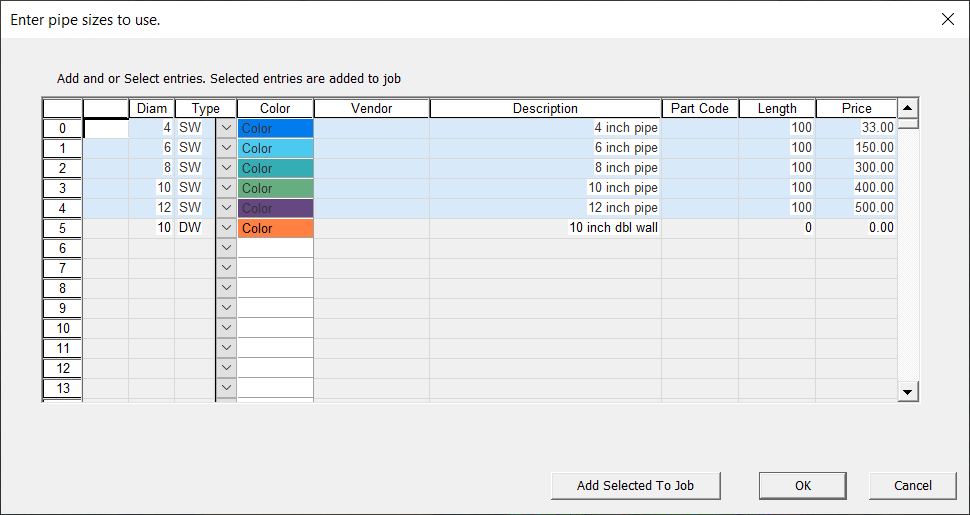
We can then add selected lines into our job. To select a line click on the number to the left, and repeat for the pipes you want. Here I have selected lines 0,1,2,3,4 but not line5. To select these lines left click on "0" and thenhold shift key and left click on the 4 and we have this:
Now click on "Add Selected To Job". Click OK and the library is saved. When you go to the next job you don't need to refill this table.
You may also want to tweak diameters for individual pipes. To do this go to the Pipes -> User Diameter.
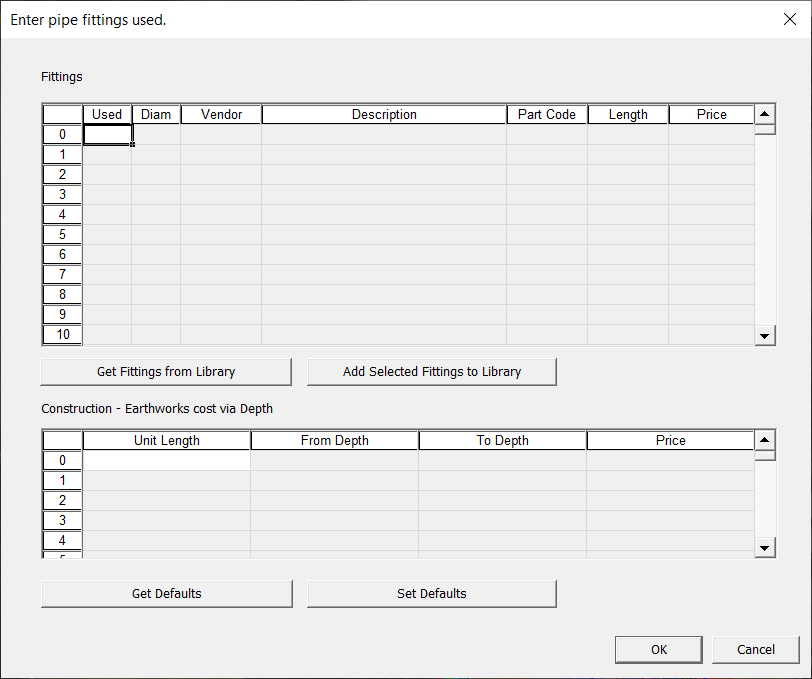
Table for Fittings:
It may or may not be worth doing this within Ezigrade. If you have any suggestions to make this more intuitive and easier then do not hesitate to send your suggestions. Click on the Pipes->Fittings menu item
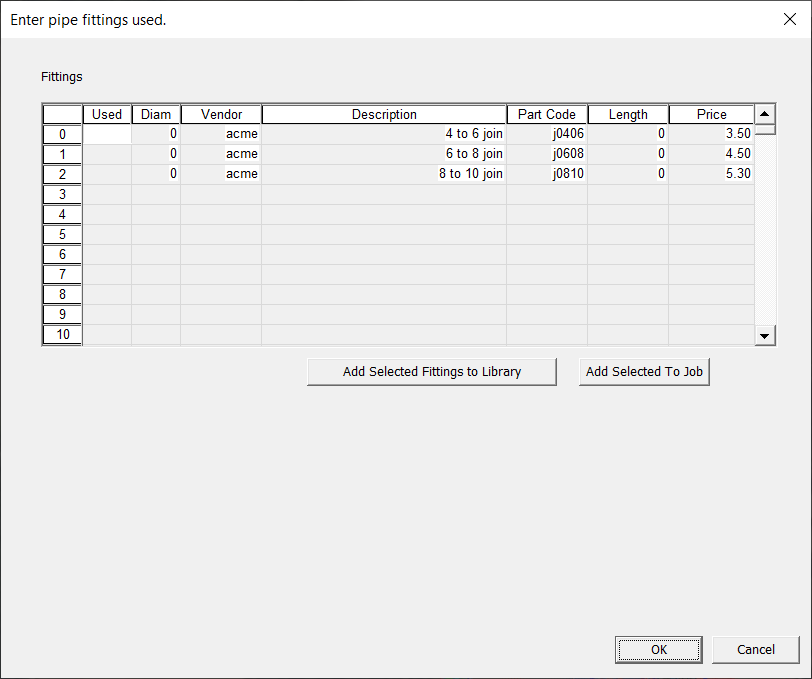
As before it is better to work in the library. So click on the "Get Fittings from Library" and we have this:
Select the appropriate lines and click on "Add Selected to Job".
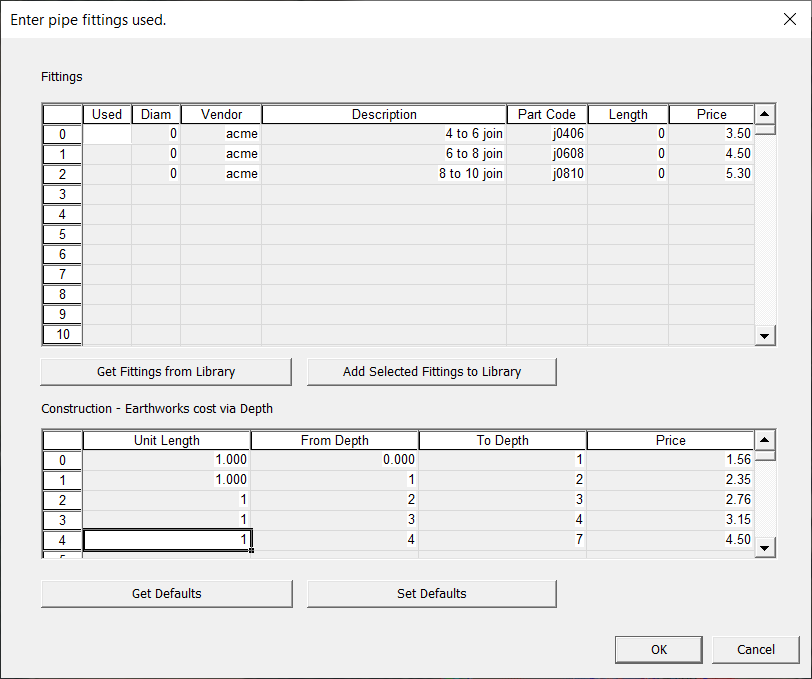
Earthworks Cost
This is done in the same dialog. It is the table at the bottom. This table is slightly different in that we don't have a library as such. However the first time fill in the table and then click on the "Set Defaults". Then in subsequent jobs you can simply click on the "Get Defaults" button.
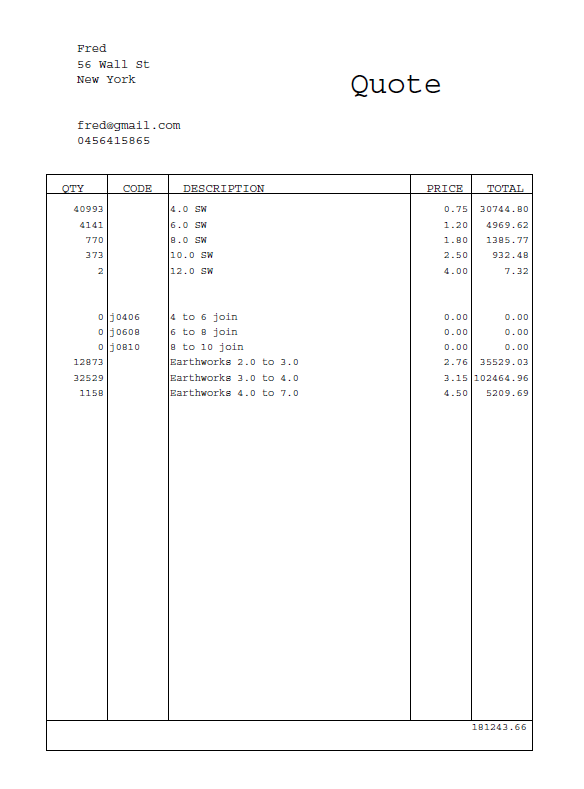
Now when you click on the Pipes -> PDF report.