Exporting to Trimble Civil Systems
Using Trimble Business Center
The traditional response is to use Trimble Business Center. It's very purpose is to enable the creation of control files for Trimble controllers and has a number of different import formats it supports, that Ezigrade is capable of exporting. From Ezigrade I suggest that you use the Export -> LandXML function and include the appropriate triangle files and linework.. You can open TBC and import the xml file - set your coordinate system and export the appropriate SVD / SVL files. The only downside being the annual subscription charge.
Using Trimble File Flipper
Trimble has another application called "Trimble File Flipper" which is free that will also enable you to convert landXML files from Ezigrade into a format suitable for your Trimble controller. You can download File Flipper using the link below:
Within Ezigrade use the Export -> LandXML function and create the XML file. Now open File Flipper and browse to your design file which is the XML. It will give you options to select any contained surfaces and to add in linework.
It then asks you to select a calibration type. If you are on a site and the data came from this site via Trimble gear then you probably already have a cal file for this site and can select "local site calibration" and browse to the file. If not select "Coordinate System Library" and you have the option of browsing to the appropriate coordinate system. I would suggest that if you don't know the coordinate system then back in Ezigrade convert your data to WGS84. Read this link
Convert to WGS84 . Then when creating the calibration file select the "World Wide" option and select the appropriate north / south zone.
Create Cal TTM and DXF in Ezigrade
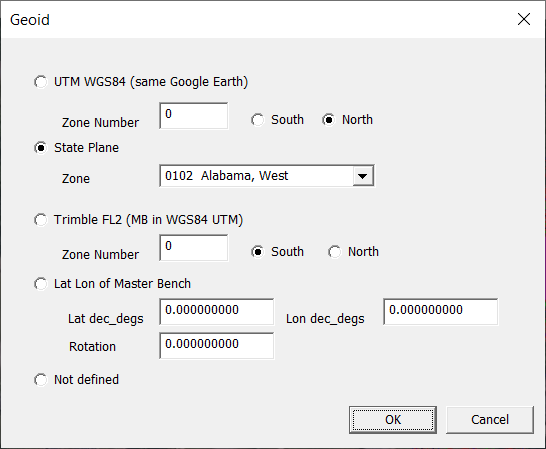
Within Ezigrade I suggest that you are using a coordinate system in either WGS84 or a US State Plane System. If you have coordinates using one of these systems then withing Ezigrade go to File -> Geoid and select the system being used. Here we are using Alabamba West state plane system.
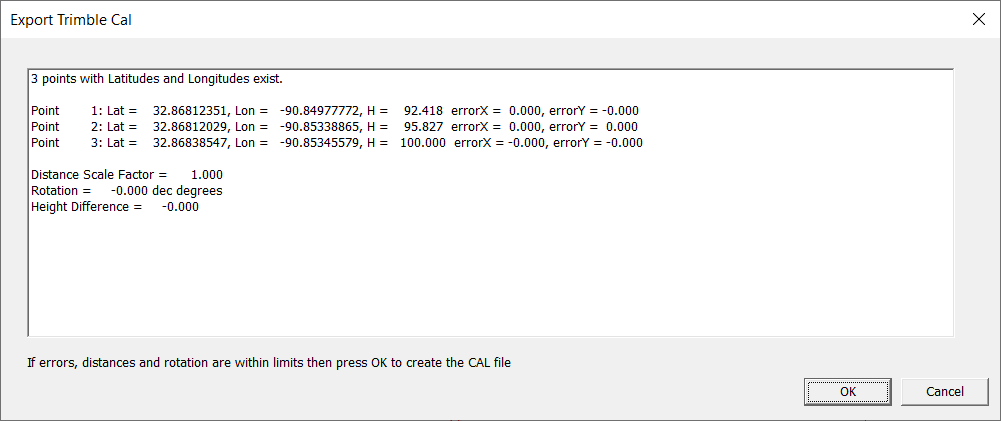
At this point I often use the Export -> Google Earth menu item and export some linework or points as a good visual check that our job is indeed where it should be. As a futher check we can also set some points withing the Ezigrade job with known lat /longs using the Tools -> Lat Long command. I would suggest at least 3 as it can then give you an error check. However this is not mandatory.
Now click on Export -> Cal and we can get something like this. If there are no lat/longs set then the list box contains a warning which you can ignore.
Now click OK and you are asked for a file name and the cal file is created.
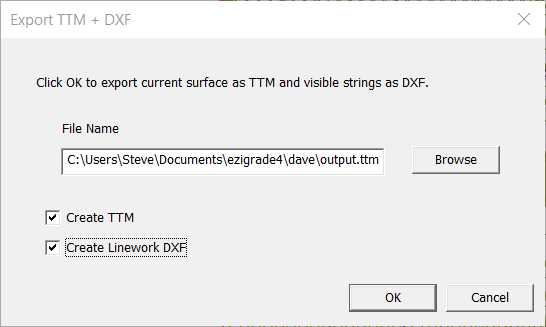
We now can create the TTM / DXF combination. At present (18-06-2026) make sure the surface you want created is being displayed. We will improve this later and click on Export -> TTM DXF.
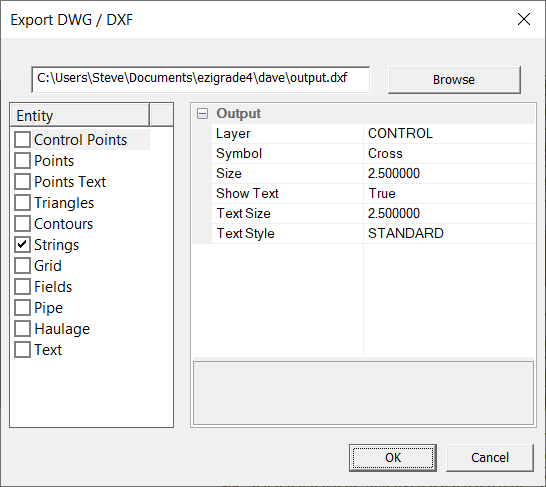
Click on browse button to set export folder and add in a file name. It will append the ttm extension if not entered. Tick both TTM and DXF tick boxes. The TTM is created and we bring up the existing Export -> DXF which is prefilled:
and simply click the OK button to create the DXF.
If you have an earlier Trimble system you should be able to use the 3 files directly.
For later systems use file flipper and create the appropriate SVD / SVL files. We intend to support these in a later update.