| < Previous page | Next page > |
Constrained Point Example
This is an example of how we can control our design through the use of adding in some "constrained points".
"Constrained Points" simply set the design height of our field at the position of the point. In this example we are going to add in a number of points to control water flow into a tail ditch. Please be aware that at present the smoothing algorithms can affect the finished height of the constraining points
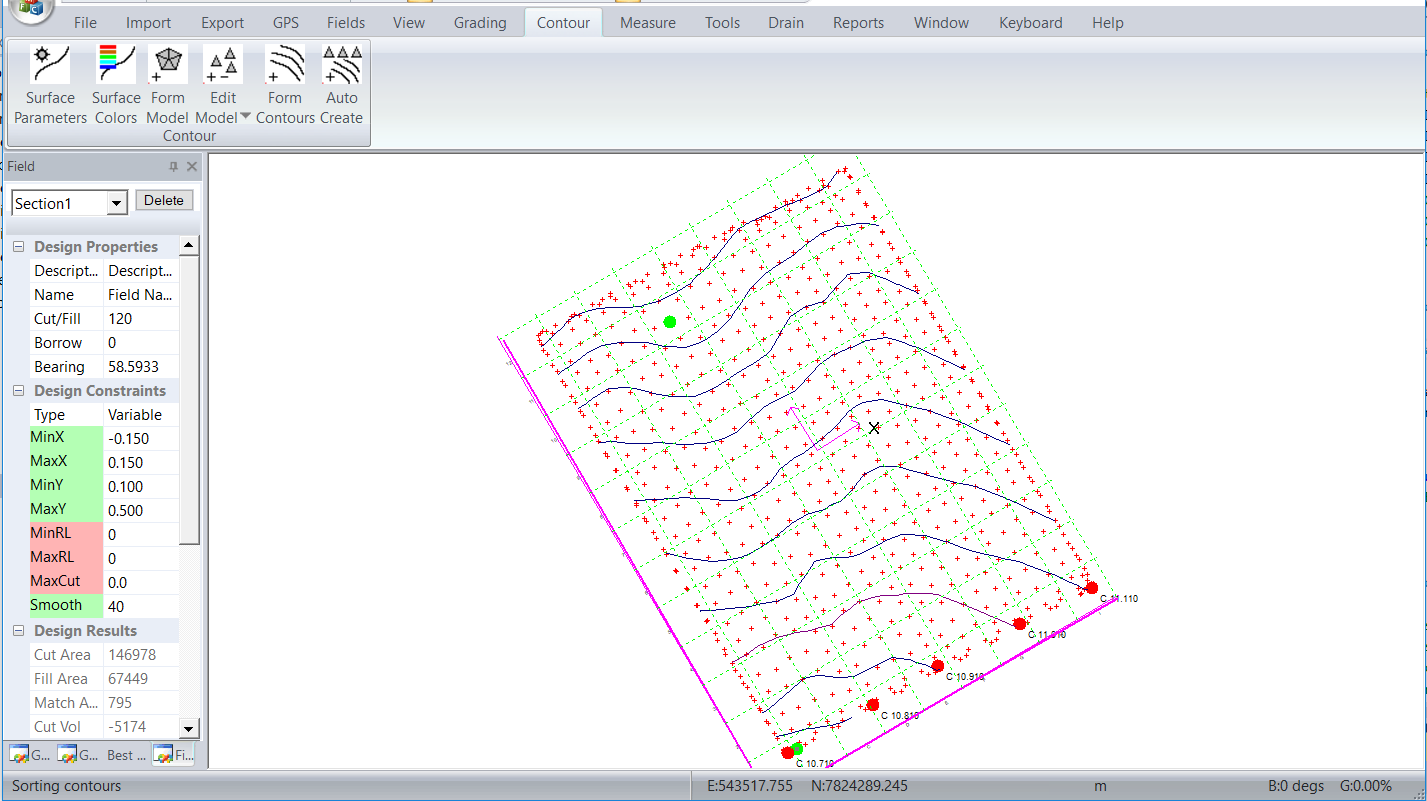
This tutorial uses data in a file called "example4.cdsdat" in the ezigrade4 data directory. If we open up this job and look at the natural surface we have the following screen.
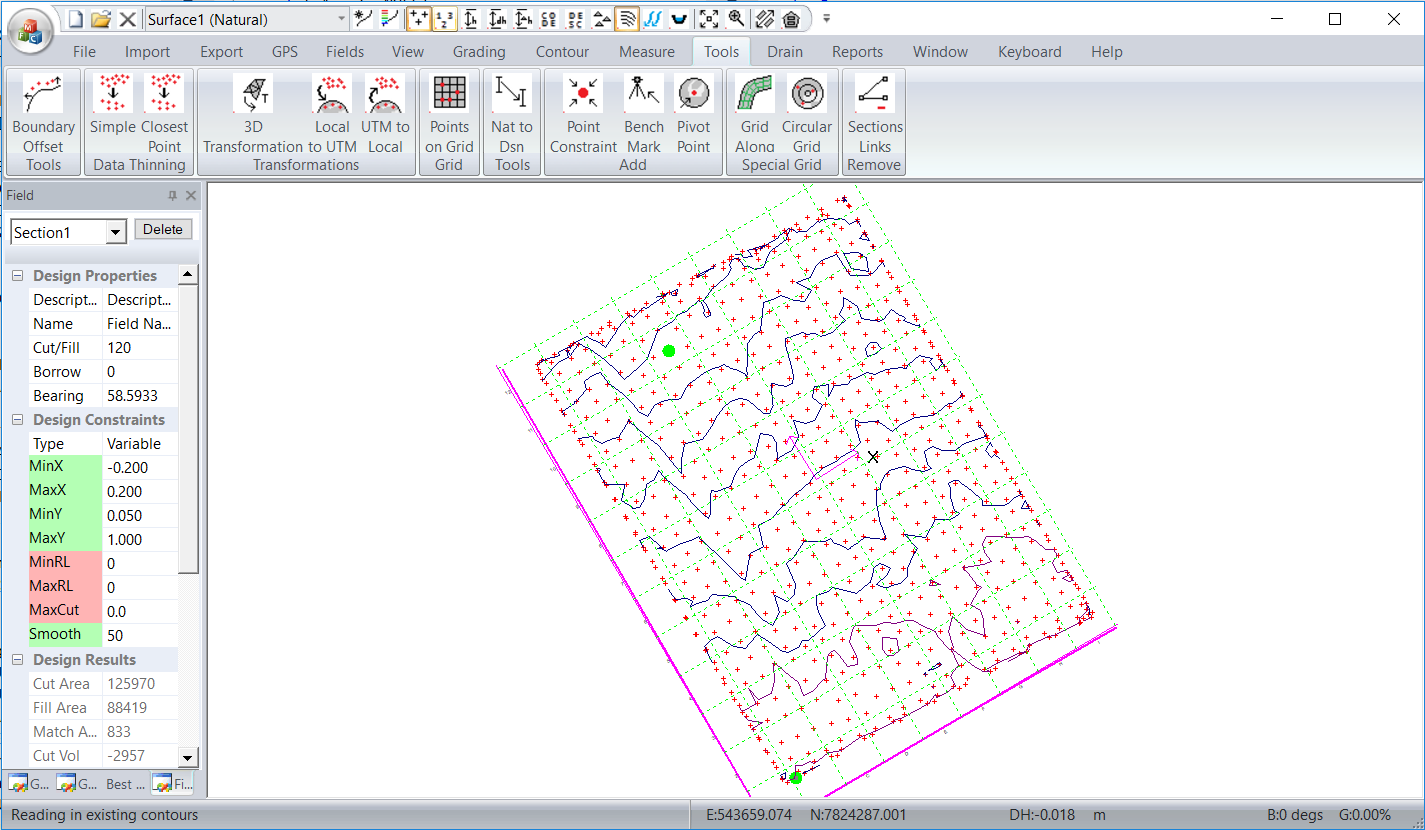
If you click on the "Grading" - "Get Section Grades" we can see the least squares solution is for a main-grade of 0.152% with a negligible cross-grade. In this example we are going to create a "grade constrained" solution. We will allow main-grades between 0.1 and 0.5% and let cross-grades of upt o 1%. Running the grading:
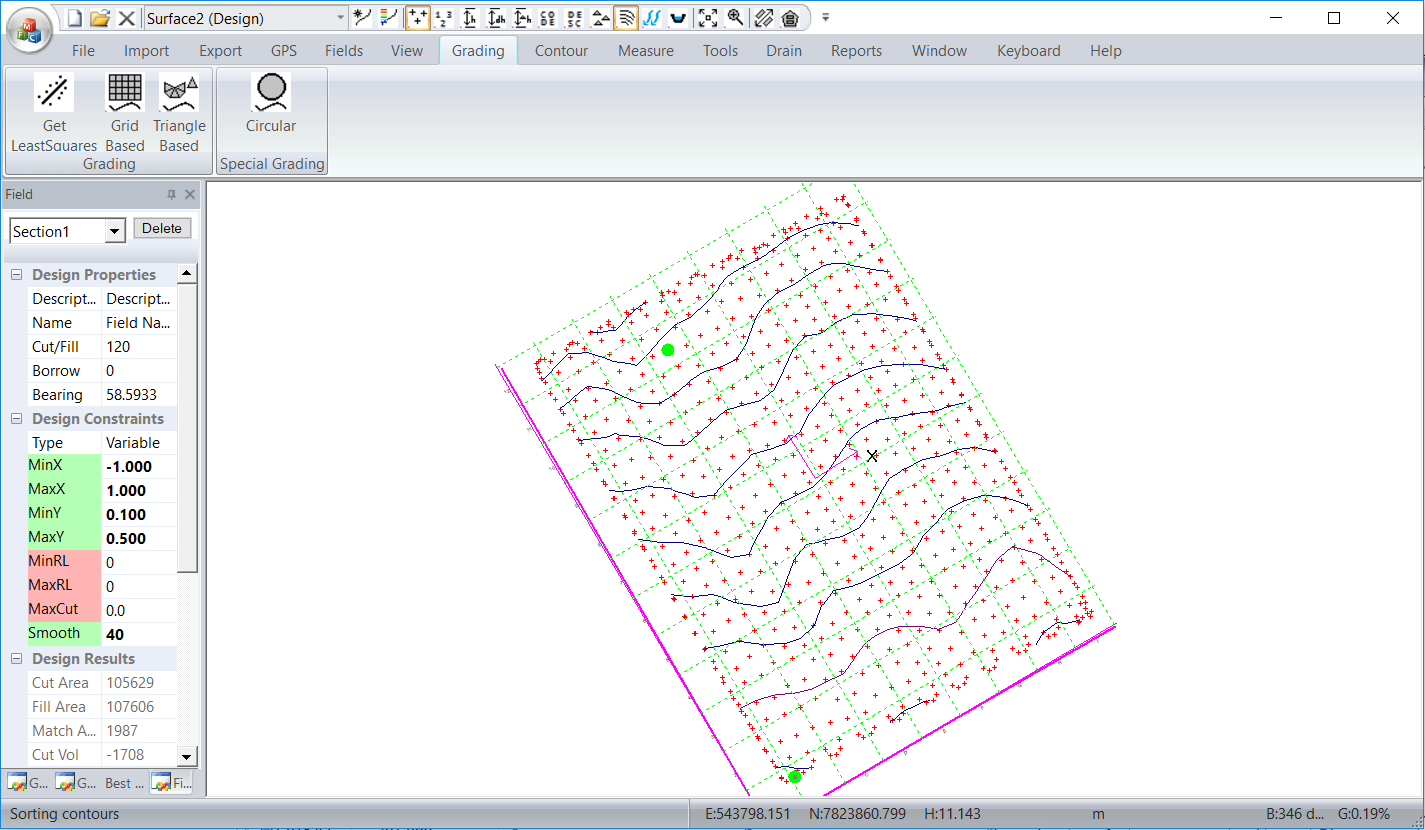
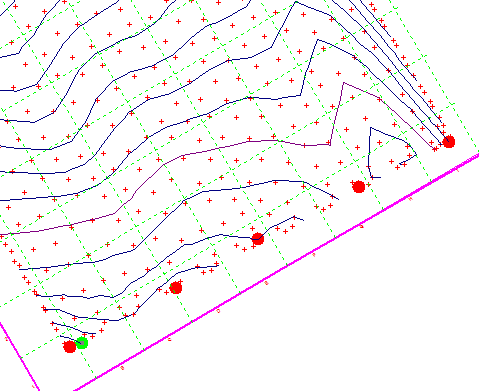
We have to remove the water from the bottom of the section. In this case we want to remove the water to the right and make it flow to the left. In this example we have allowed cross grades up to +-1%. We need to restrict any fall along the bottom to be less than 1%. In this example we will add in five constrained points along the bottom. The points will be higher to the right and grade to the left. We will keep the center point at the bottom at the same height and drop points to the left and raise points to the right.
For our first design we will try a value of 0.1%. So the five points across the screen have heights of 10.71,10.81,10.91,11.01 and 11.11 respectively.
We are going to put in the points by eye. For a more rigorous solution you can calculate the points exactly.
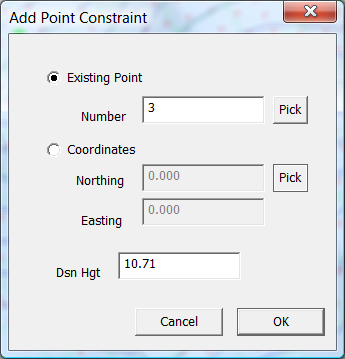
From the Tools - Add Constrained Point , bring up the dialog box. Click on the pick button to the right of number. Here we have selected a point lower left and set height to 10.71. Repeat by eye for the remaining points.
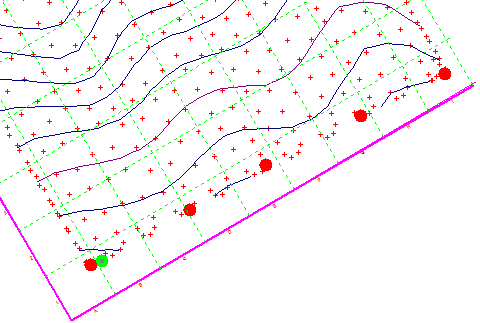
We now have the 5 constrained points.
Now redo the grading. This is only supported with the triangular grading. So click "Grading" - "Grading (Triangle Based)". The design is calculated and we get the following.
Looking at this; one would be inclined to say this design is "rubbish" and one would have to agree. What is happening is that the Linear Programming algorithm has in fact matched the design height of the surface at the "constrained" points. However the allowable minmax cross grades has allowed the heights between the points to sneak back. In this case we would need to add in more "constrained" points.
However if we tighten the cross-grades this will be harder to happen. Our slope along the bottom is set at 0.1% so we could go back for example and set the cross grades to 0.15%. Running this again we get the following:-
If we set the min and max cross grade to 0.1 for example the grading stops with the following:
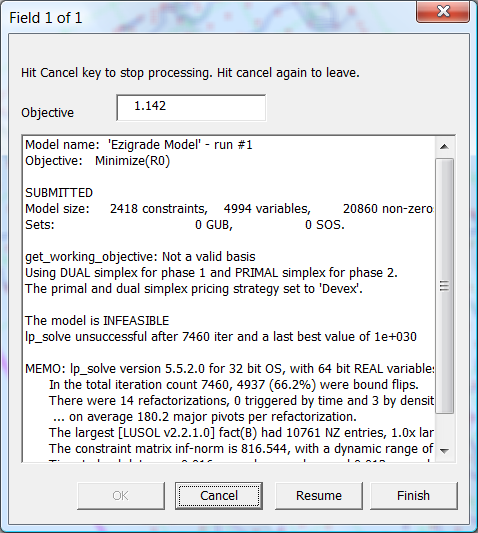
You will notice the line that say's "The model is INFEASIBLE". If you come across this you know that the constraints are too restrictive and need to be relaxed.
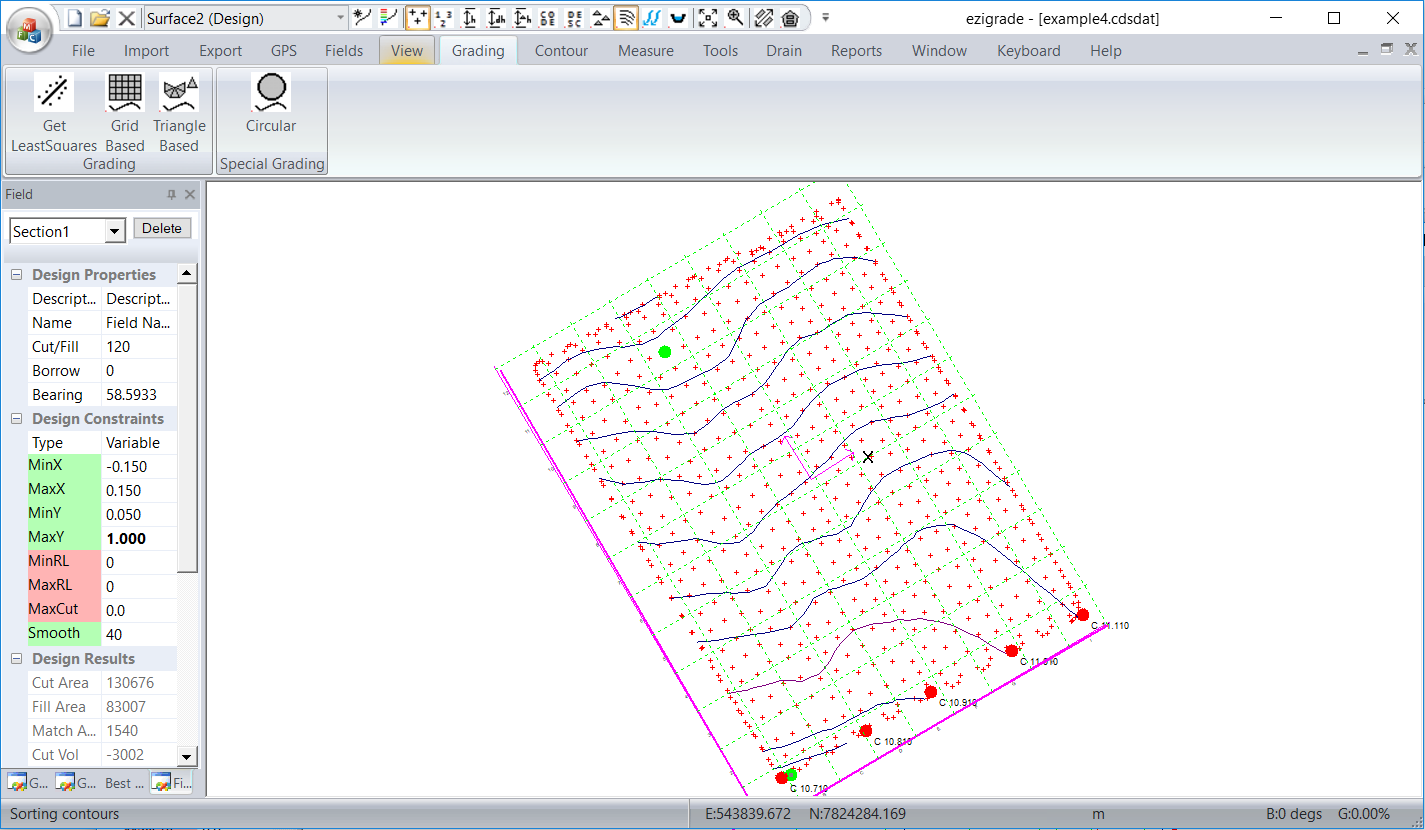
If you look at the last successful model you will notice that the grading on right hand side compensating for the height of the tail drain extends most of the way up the job. If we relax the main grade constraints we can reduce the volumes and still get the water to flow as we desire.
Please be aware that there are other ways of creating the same. You can create a job with two sections. One section is the majority of the job with a new section along the bottom that is defined as a "Plane" with a set grade with hinge joint and extra points on the hinge.
|