| < Previous page | Next page > |
Gridding the data and designing
In this example we are going to show an alternative design after first gridding the data. For a description of the "gridding function" please click on the link.
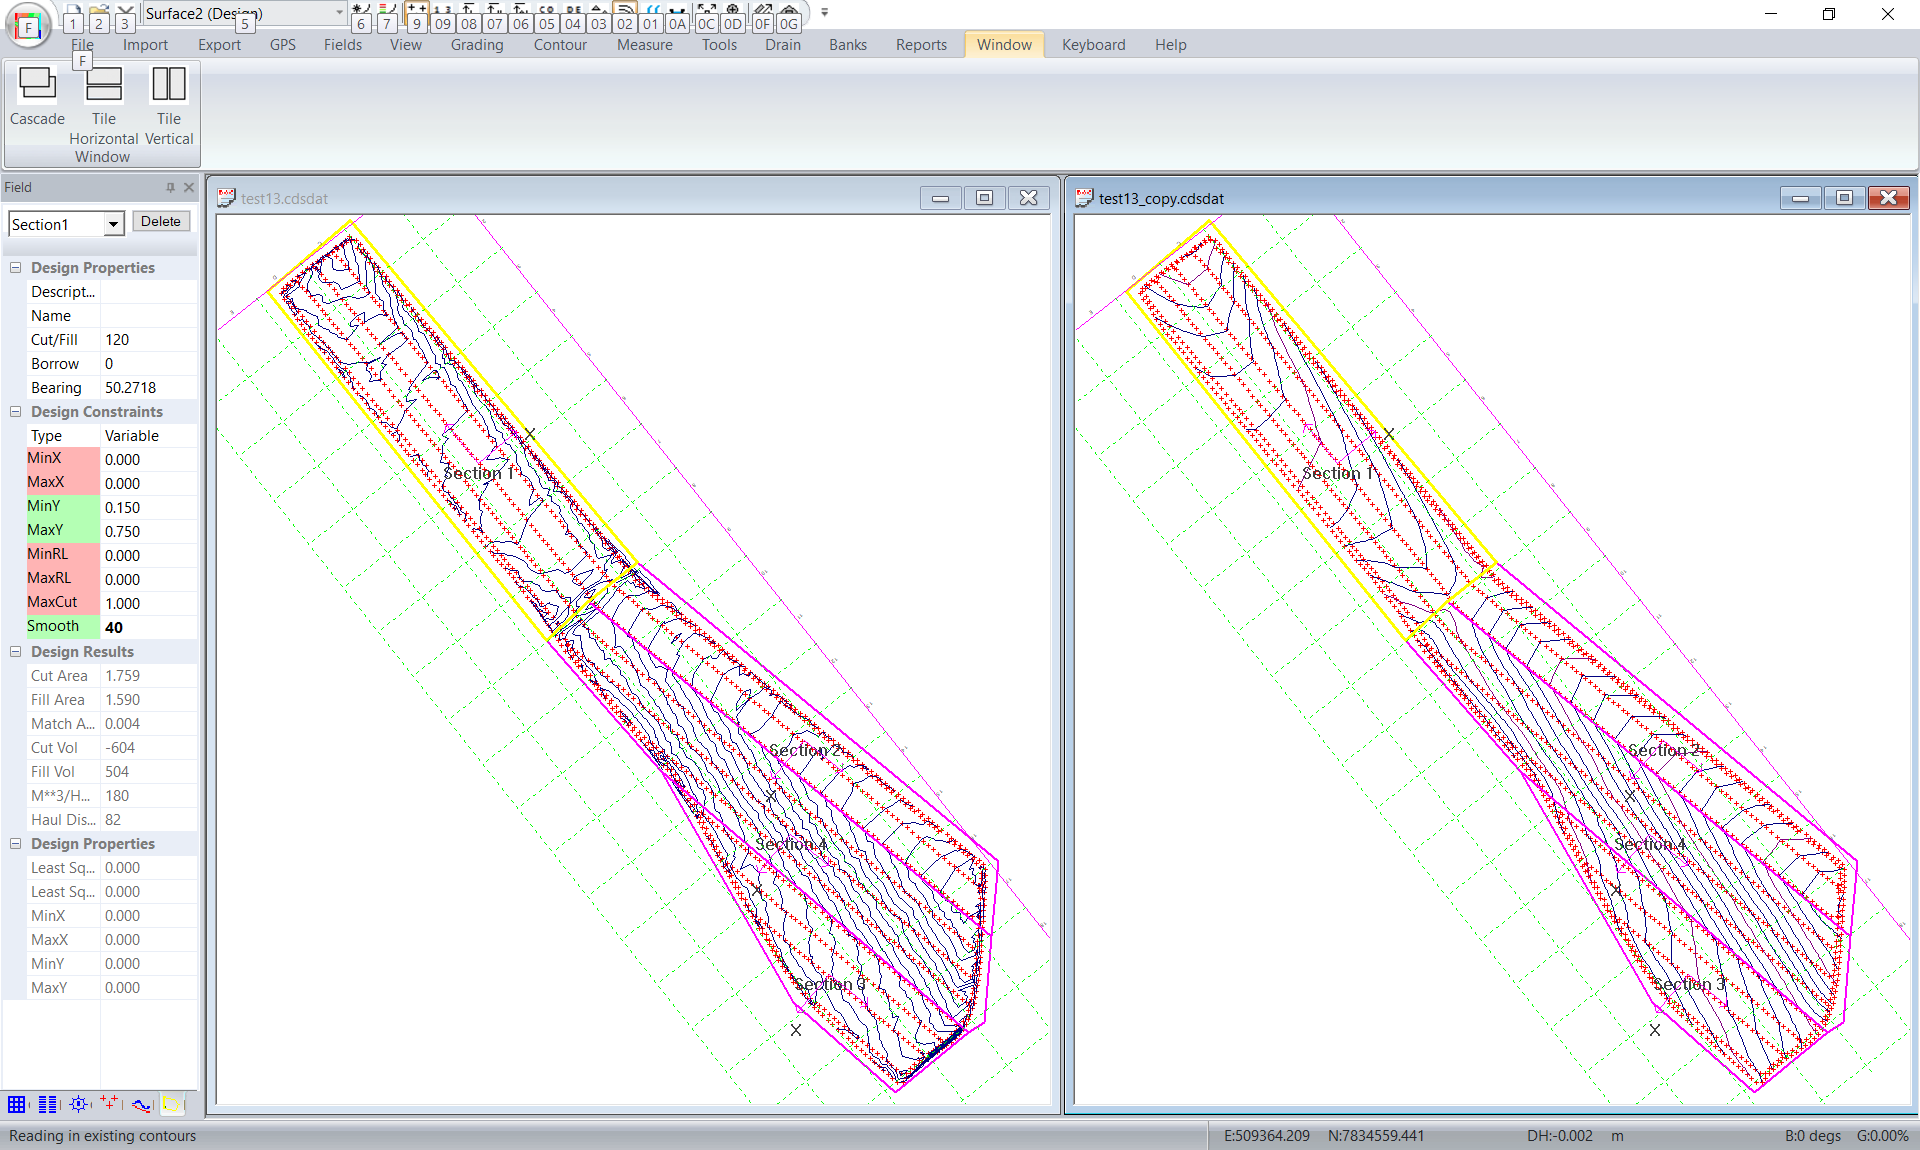
We have been given some data and have imported it to create the following job. You will notice that the data points picked up are relatively close together. However the rows are a relatively large distance apart. The surface along a row is fairly well defined. However we have no idea of the surface between rows. All we can assume is that the surface is a constant slope between rows. In the screen shot below we have the natural surface on the left and you can see the design surface on the right. The design is segmented due to the lack of data between the rows.
We are now going to grid the data. Click on Fields -> Grid and the following dialog is displayed.
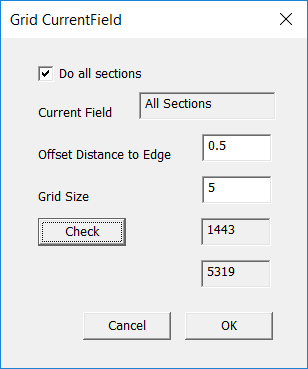
Click on "Do All Sections" as we are doing the whole job. Set an appropriate grid size. After selecting a value then click on "Check". This gives us the original job size and the final job size. In this case a 5m job leads to 5000 points. This is a very manageable job. If we had 50000 for example I would suggest a larger grid size. It comes back to how powerful your computer is and how patient you are when the software is running. Click OK and the job is gridded.
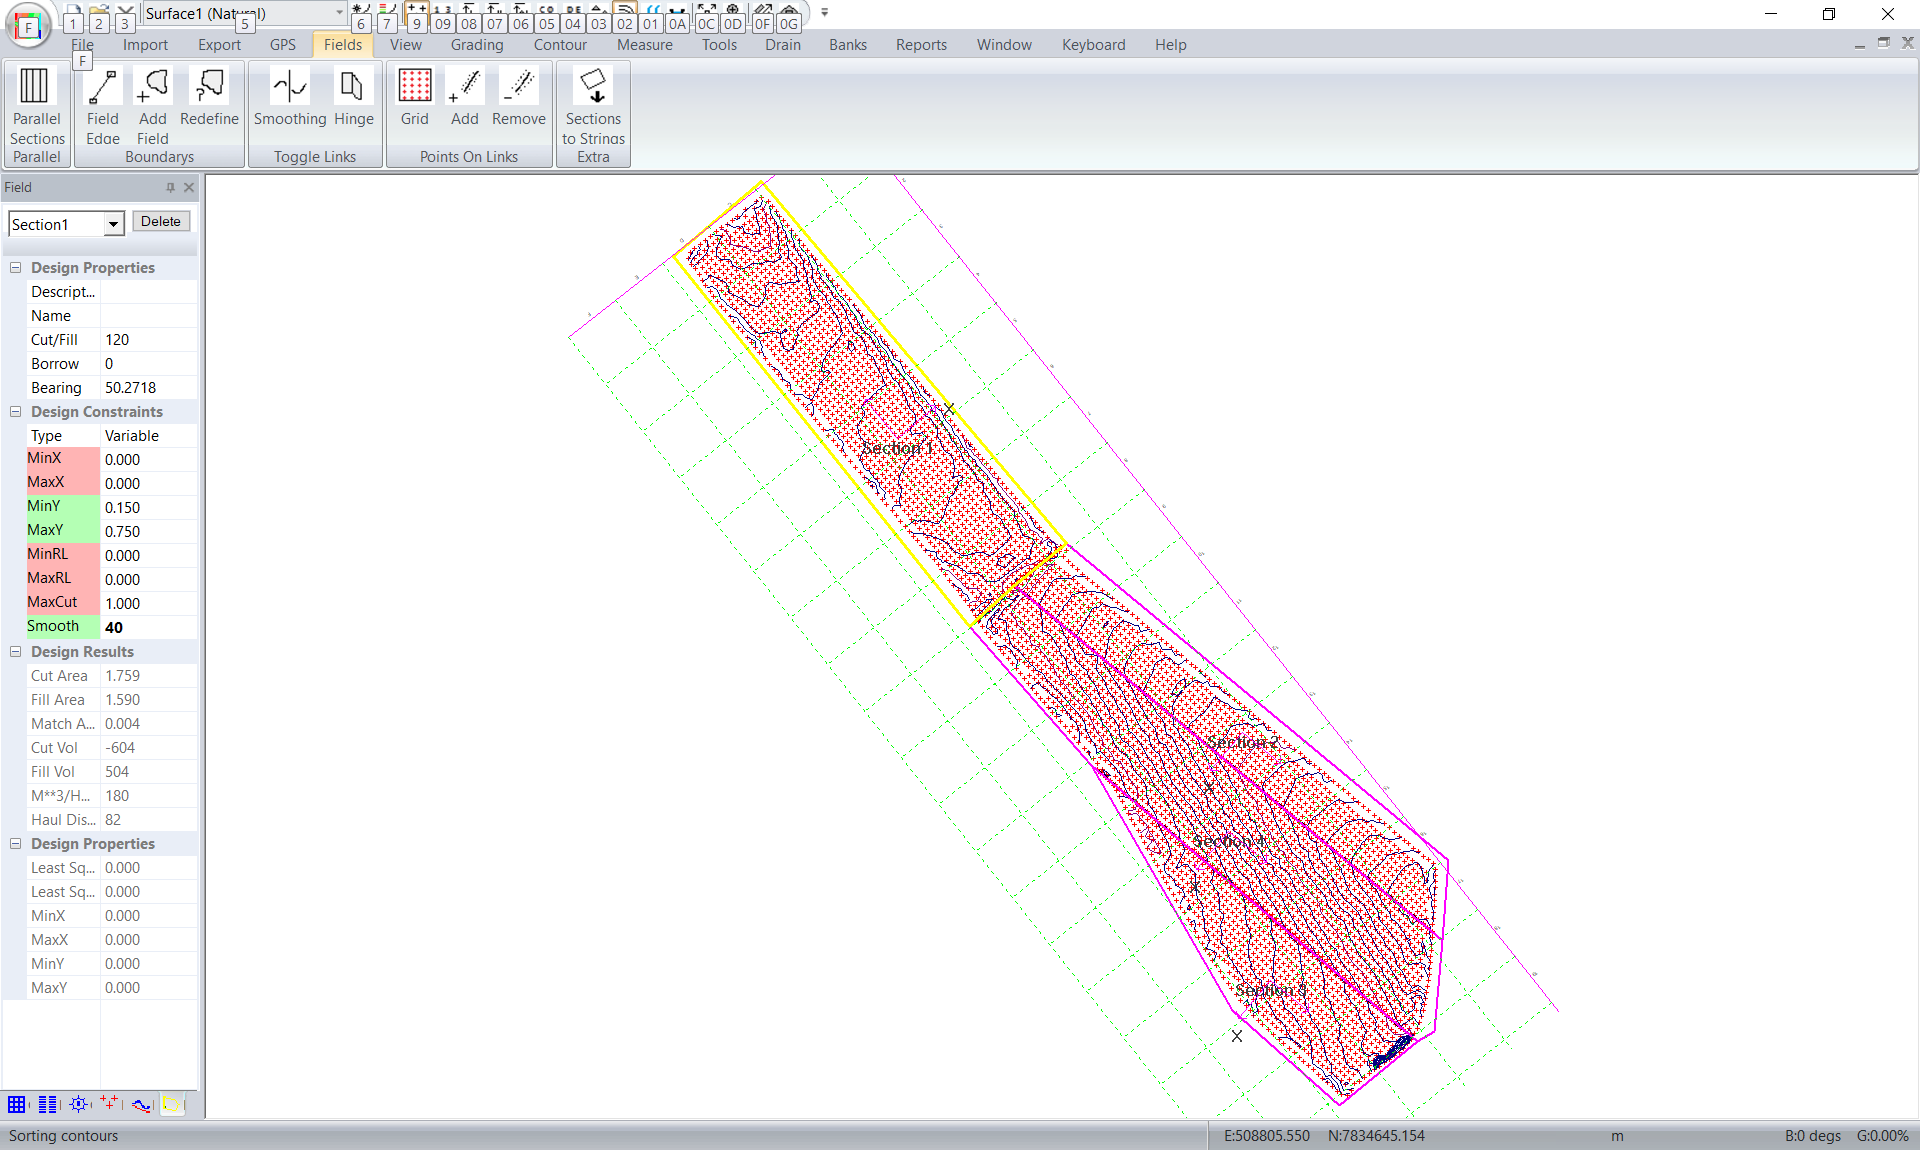
Make sure the natural surface contours still look OK. As you have noticed the existing natural surface points have been removed and replaced with data on a grid. If at any time you wish to revert to the pre-gridded data then do the following. Click on File -> Restore. This brings up the File Archive dialog:
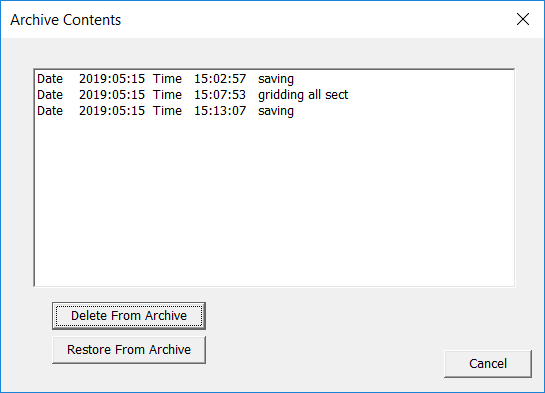
You will see that one of the entries says "gridding all sect". You can come here at anytime - select this entry and click on "Restore from Archive". We are returned to the state of the job before we did the gridding.
Continuing with our job. We have the job. Simply go into Grading -> Tri based and run the job again.

You will notice that a visual inspection of the job shows a smoother more pleasing result. The volumes are also smaller than the original job. However be aware that the volume reported is back to the gridded natural surface; not the surface points picked up. The volume back to the original will be slightly higher.
|